Project update 5 of 15
HealthyPi-v3 with Raspberry Pi 3/Pi Zero as a Wireless Standalone Monitor
In previous updates, we described how the HealthyPi can be used with a display and touchscreen, and with a PC. Today’s update shows you how to turn the HealthyPi into a standalone, wireless vital sign monitor.
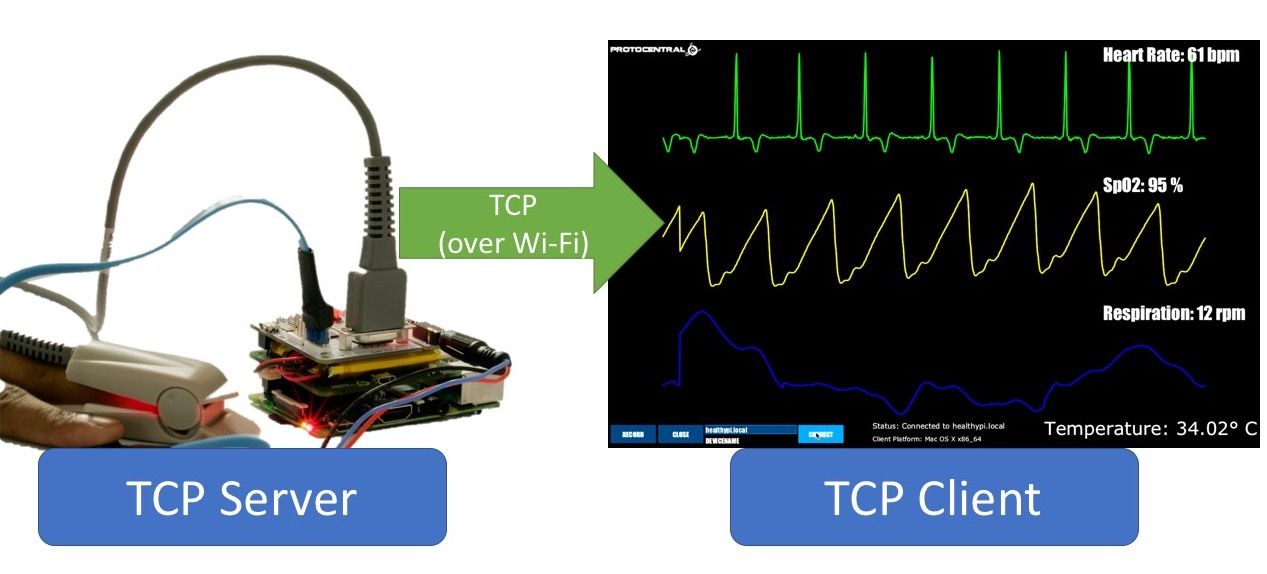
Combined with a Raspberry Pi 3 (which has built-in Wi-Fi) and a power source, the HealthyPi-v3 can turn into a completely wireless, self-sustaining standalone vital sign monitor. Here, we show the system working in continuous streaming mode over Wi-Fi using the TCP protocol to establish a direct connection between a standalone, display-less HealthyPi and Raspberry Pi 3 "sandwich" and a Processing GUI running on a remote platform.
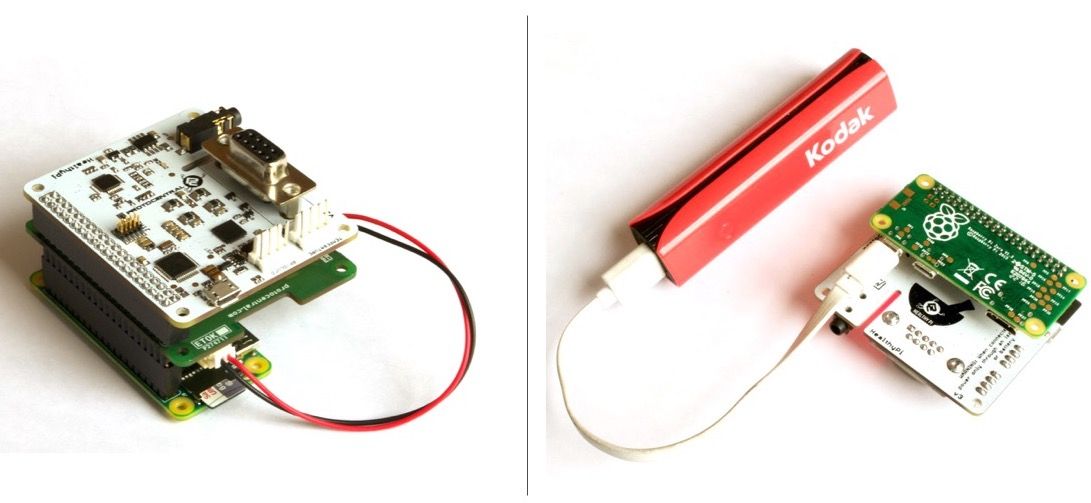
The HealthyPi 3 plays nice with the Raspberry Pi Zero too. We luckily had one lying around and tested the HealthyPi with Pi Zero as well. In fact, for standalone applications we think the Pi Zero works perfectly well (if you can get your hands on one that is). However, since the Raspberry Pi Zero does not have Wi-Fi, we had to add an external Wi-Fi dongle.
The "Sandwich"
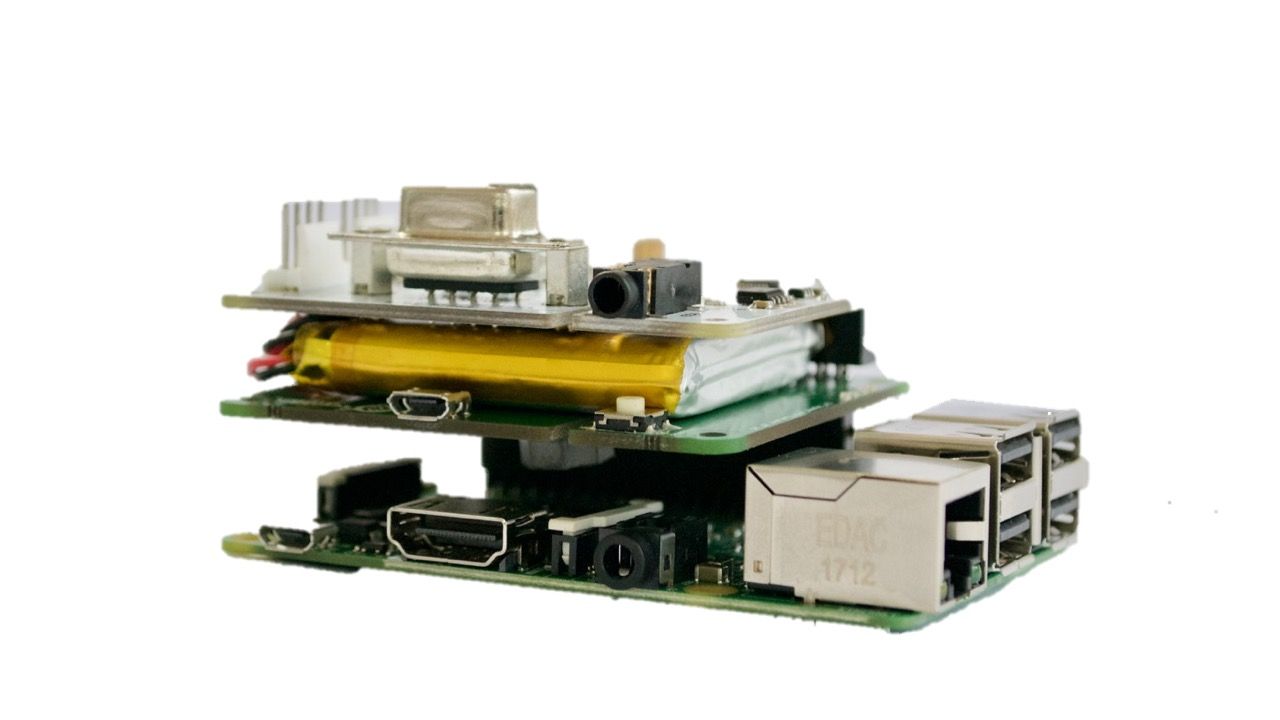
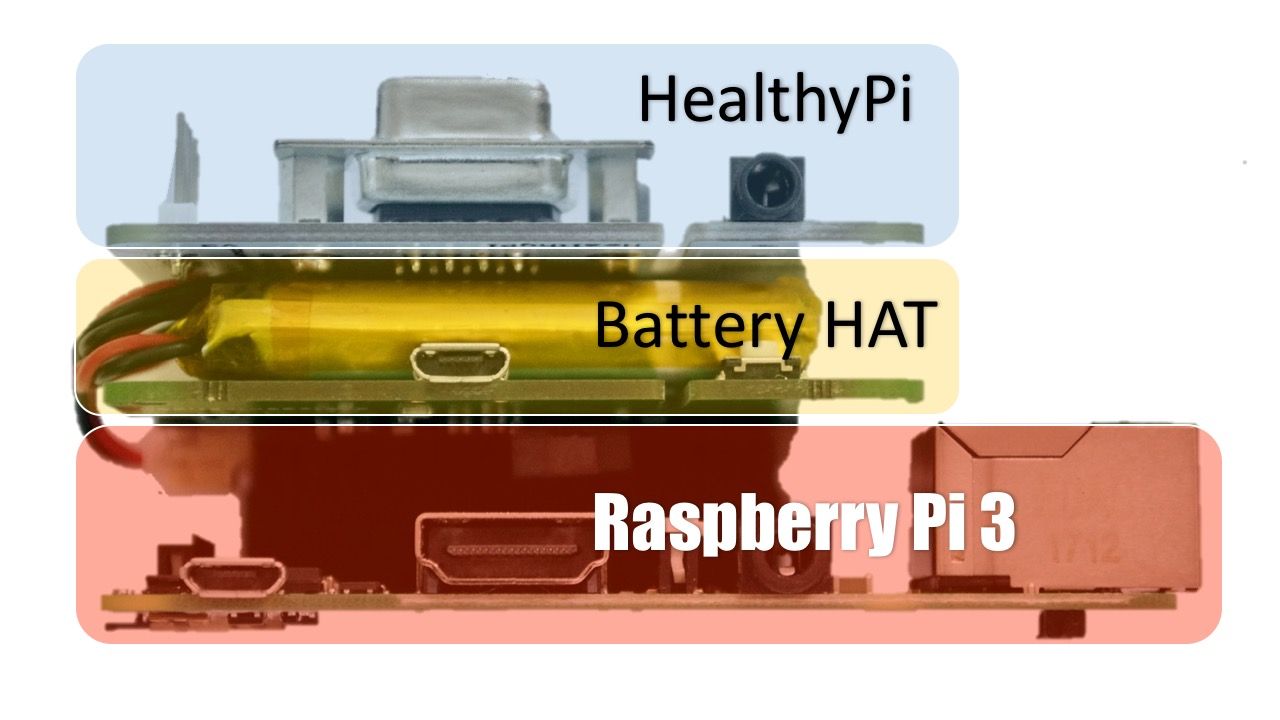
For making a complete unit, we have stacked the HealthyPi-v3 HAT atop ProtoCentral’s Battery HAT which is mounted atop the Raspberry Pi’s 40-pin header. This stack makes for a nice, compact monitor that can be used for remote monitoring and ambulatory monitoring applications.
With the Battery HAT, the unit becomes truly standalone, in one nice stack. Alternatively, you could also power it directly from a USB power bank for mobility. Find the Battery HAT under the "pledges" to buy along with your HealthyPi.
Continuous realtime data streaming
In this mode, the Raspberry Pi 3 acts as the TCP server and the HealthyPi GUI, running on any supported platform, acts as the TCP client which receives and visualizes the data in real-time. There is also an option to record this data on the client side.
On the Raspberry Pi, a simple Python script can re-route the serial port data to a TCP socket, making it a TCP server that can stream the HealthyPi’s data in real-time. This script will put the Raspberry Pi in listening mode to "listen" for any incoming client connections.
On the client platform, the same Processing-based GUI application used for the serial interface, connects to the remote Raspberry Pi (called here by its mDNS name "healthypi.local"), receives the data and visualizes it in realtime.
Both devices need to be connected to the same Wi-Fi network or access point.
Why is this important?
This capability brings in a lot of new possibilities for use of the HealthyPi in research BEYOND traditional patient monitoring. Of particular interest are:
- Continuous monitoring of multiple subjects in a hospital setting using a portable, possibly wearable device.
- Development of early warning systems based on historical trends
- Design of lifestyle and health products
- The use of Raspberry Pi as the host computer allows full flexibility to easily transition from a full-featured patient monitor (with a display) to a head-less vital sign monitor for a specific application, with custom code and algorithms running on the Pi.


