Project update 10 of 11
ESP32 + BioAmp EXG Pill
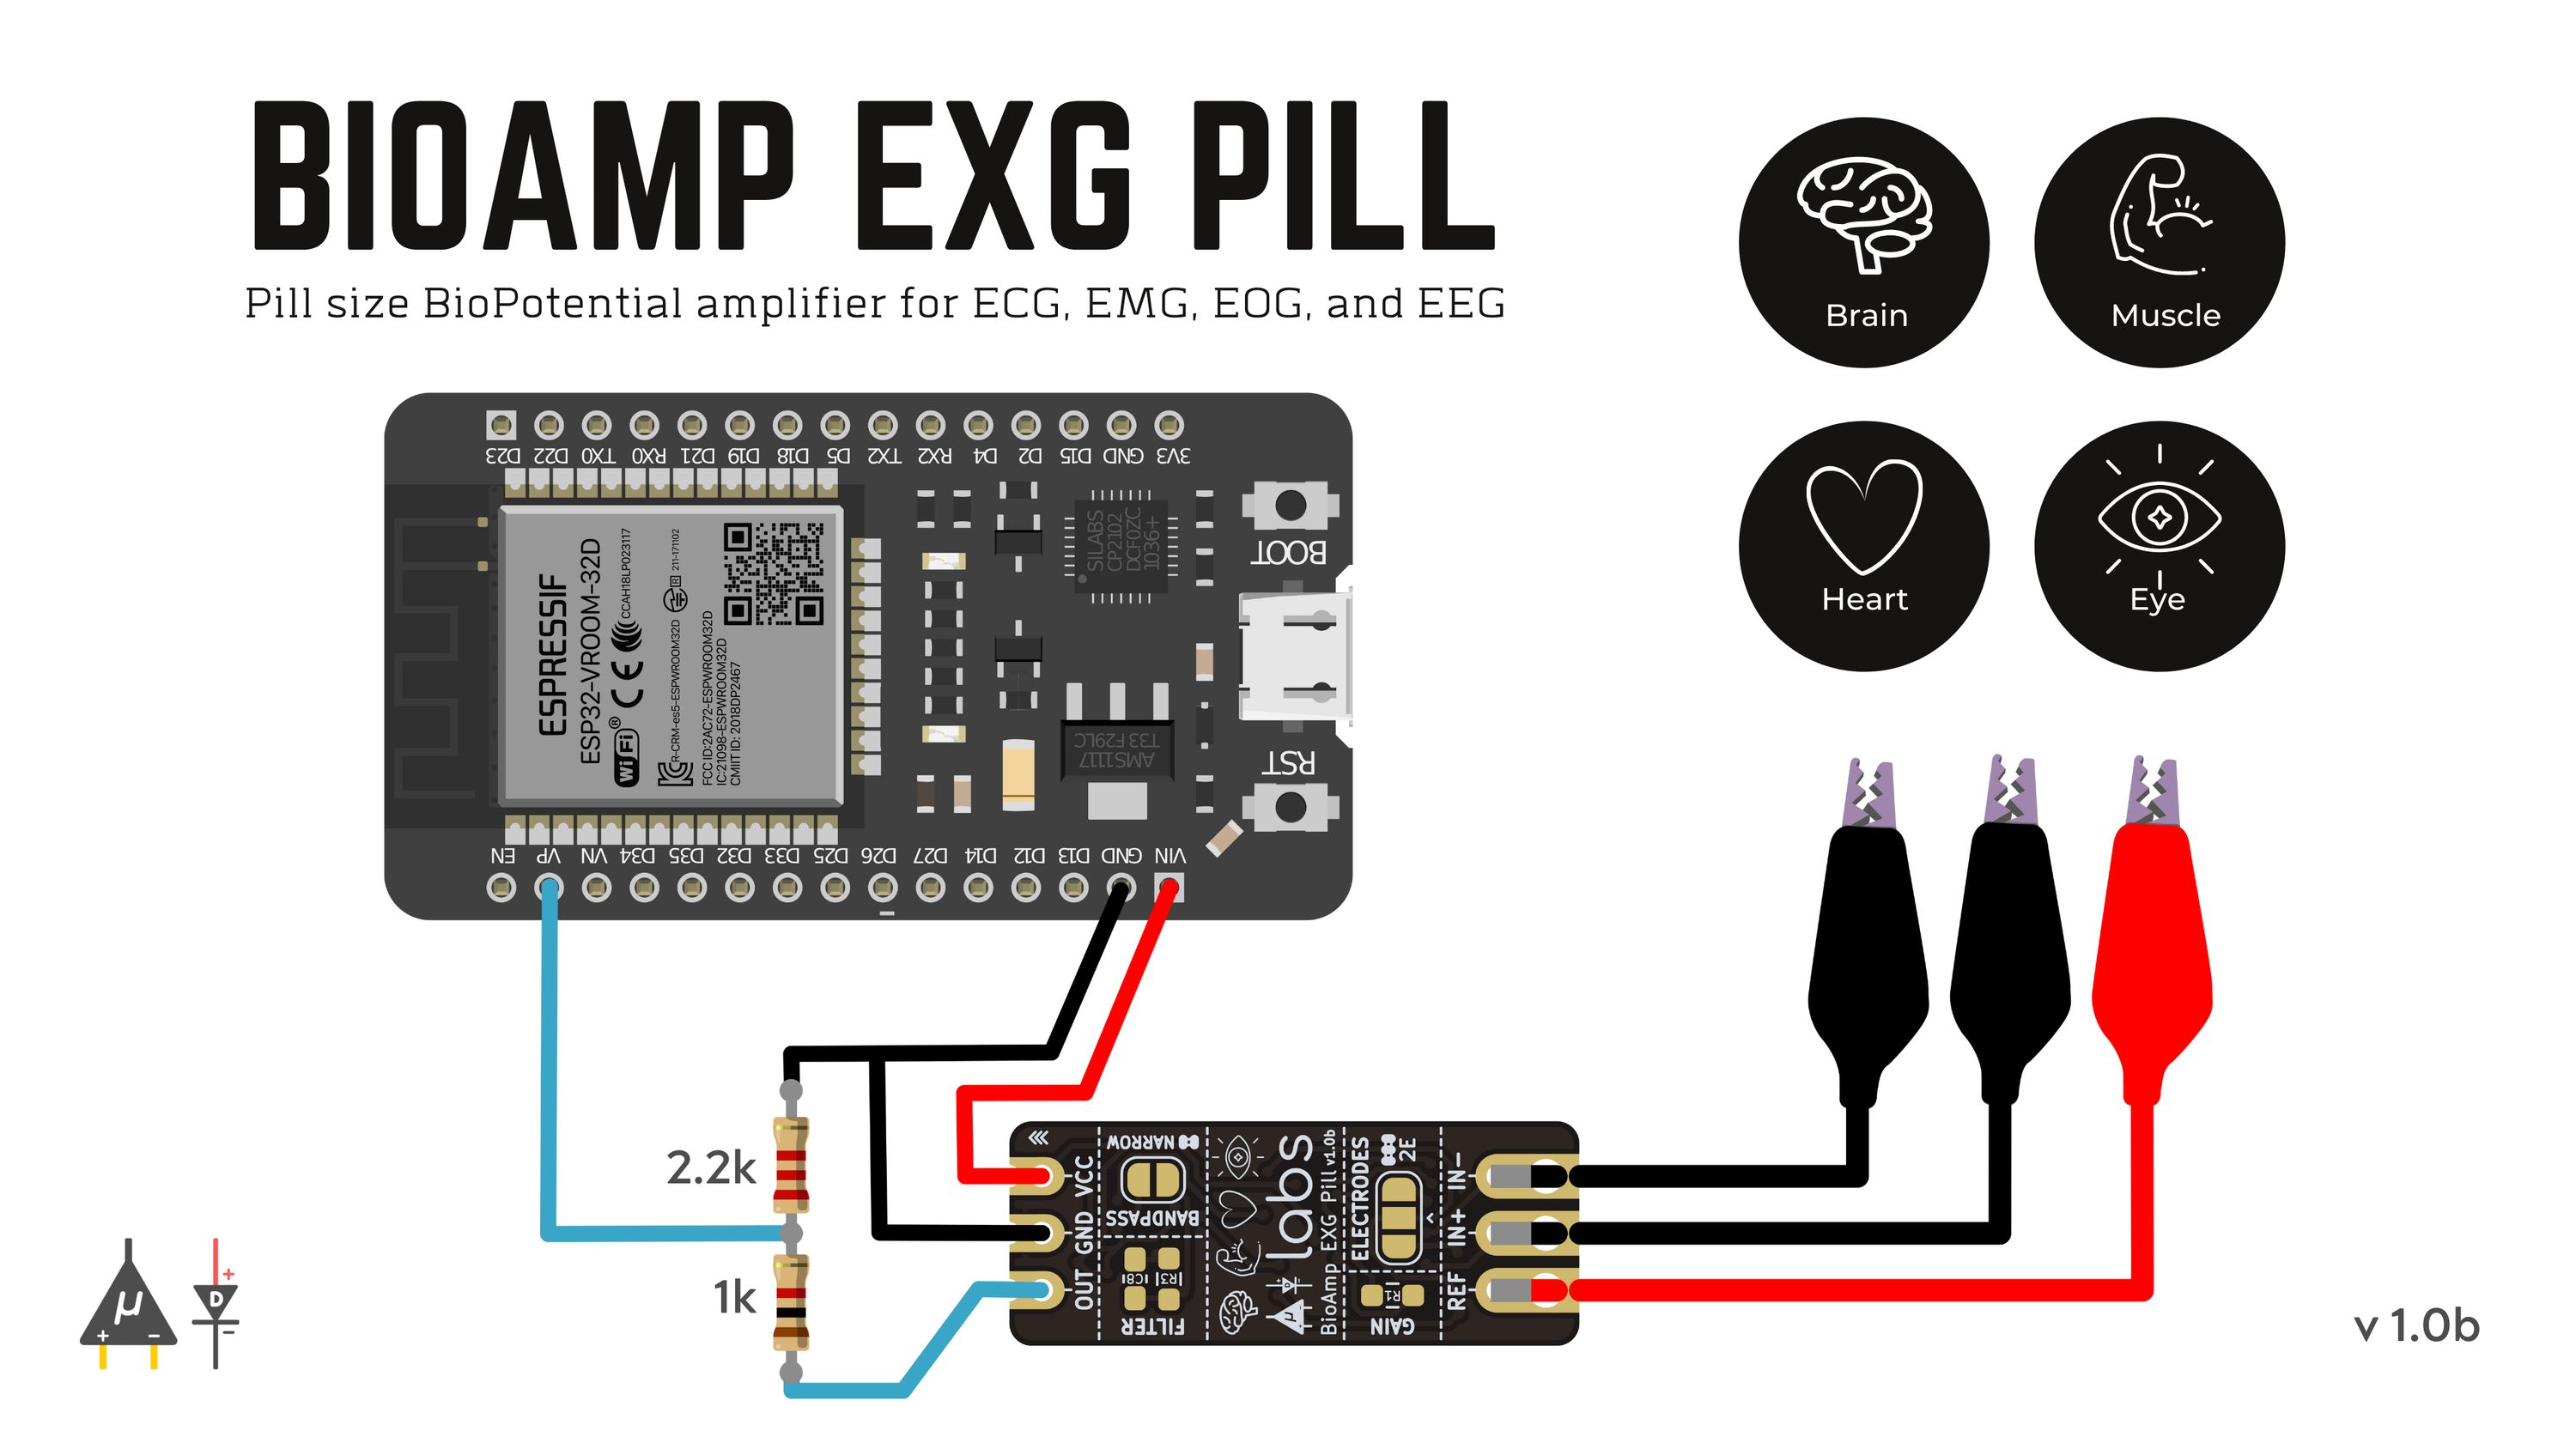
by Deepak KhatriEspressif’s ESP32 is a feature-rich MCU with integrated Wi-Fi and Bluetooth connectivity for a wide-range of applications. It’s 12 bit ADC input is a little noisy, but it can easily be coupled with the BioAmp EXG Pill to record ECG, EMG, EOG, and EEG. To make things work, you need to create a voltage divider using 2.2 k and 1 k just like shown in the connection diagram below and flash the Fixed Sampling on to your ESP32 development board.
Using the exact setup and BioAmp EXG Pill example Arduino sketches you can easily do Electromyography, Electrocardiography, Electrooculography, and Electroencephalography.
Electromyograph
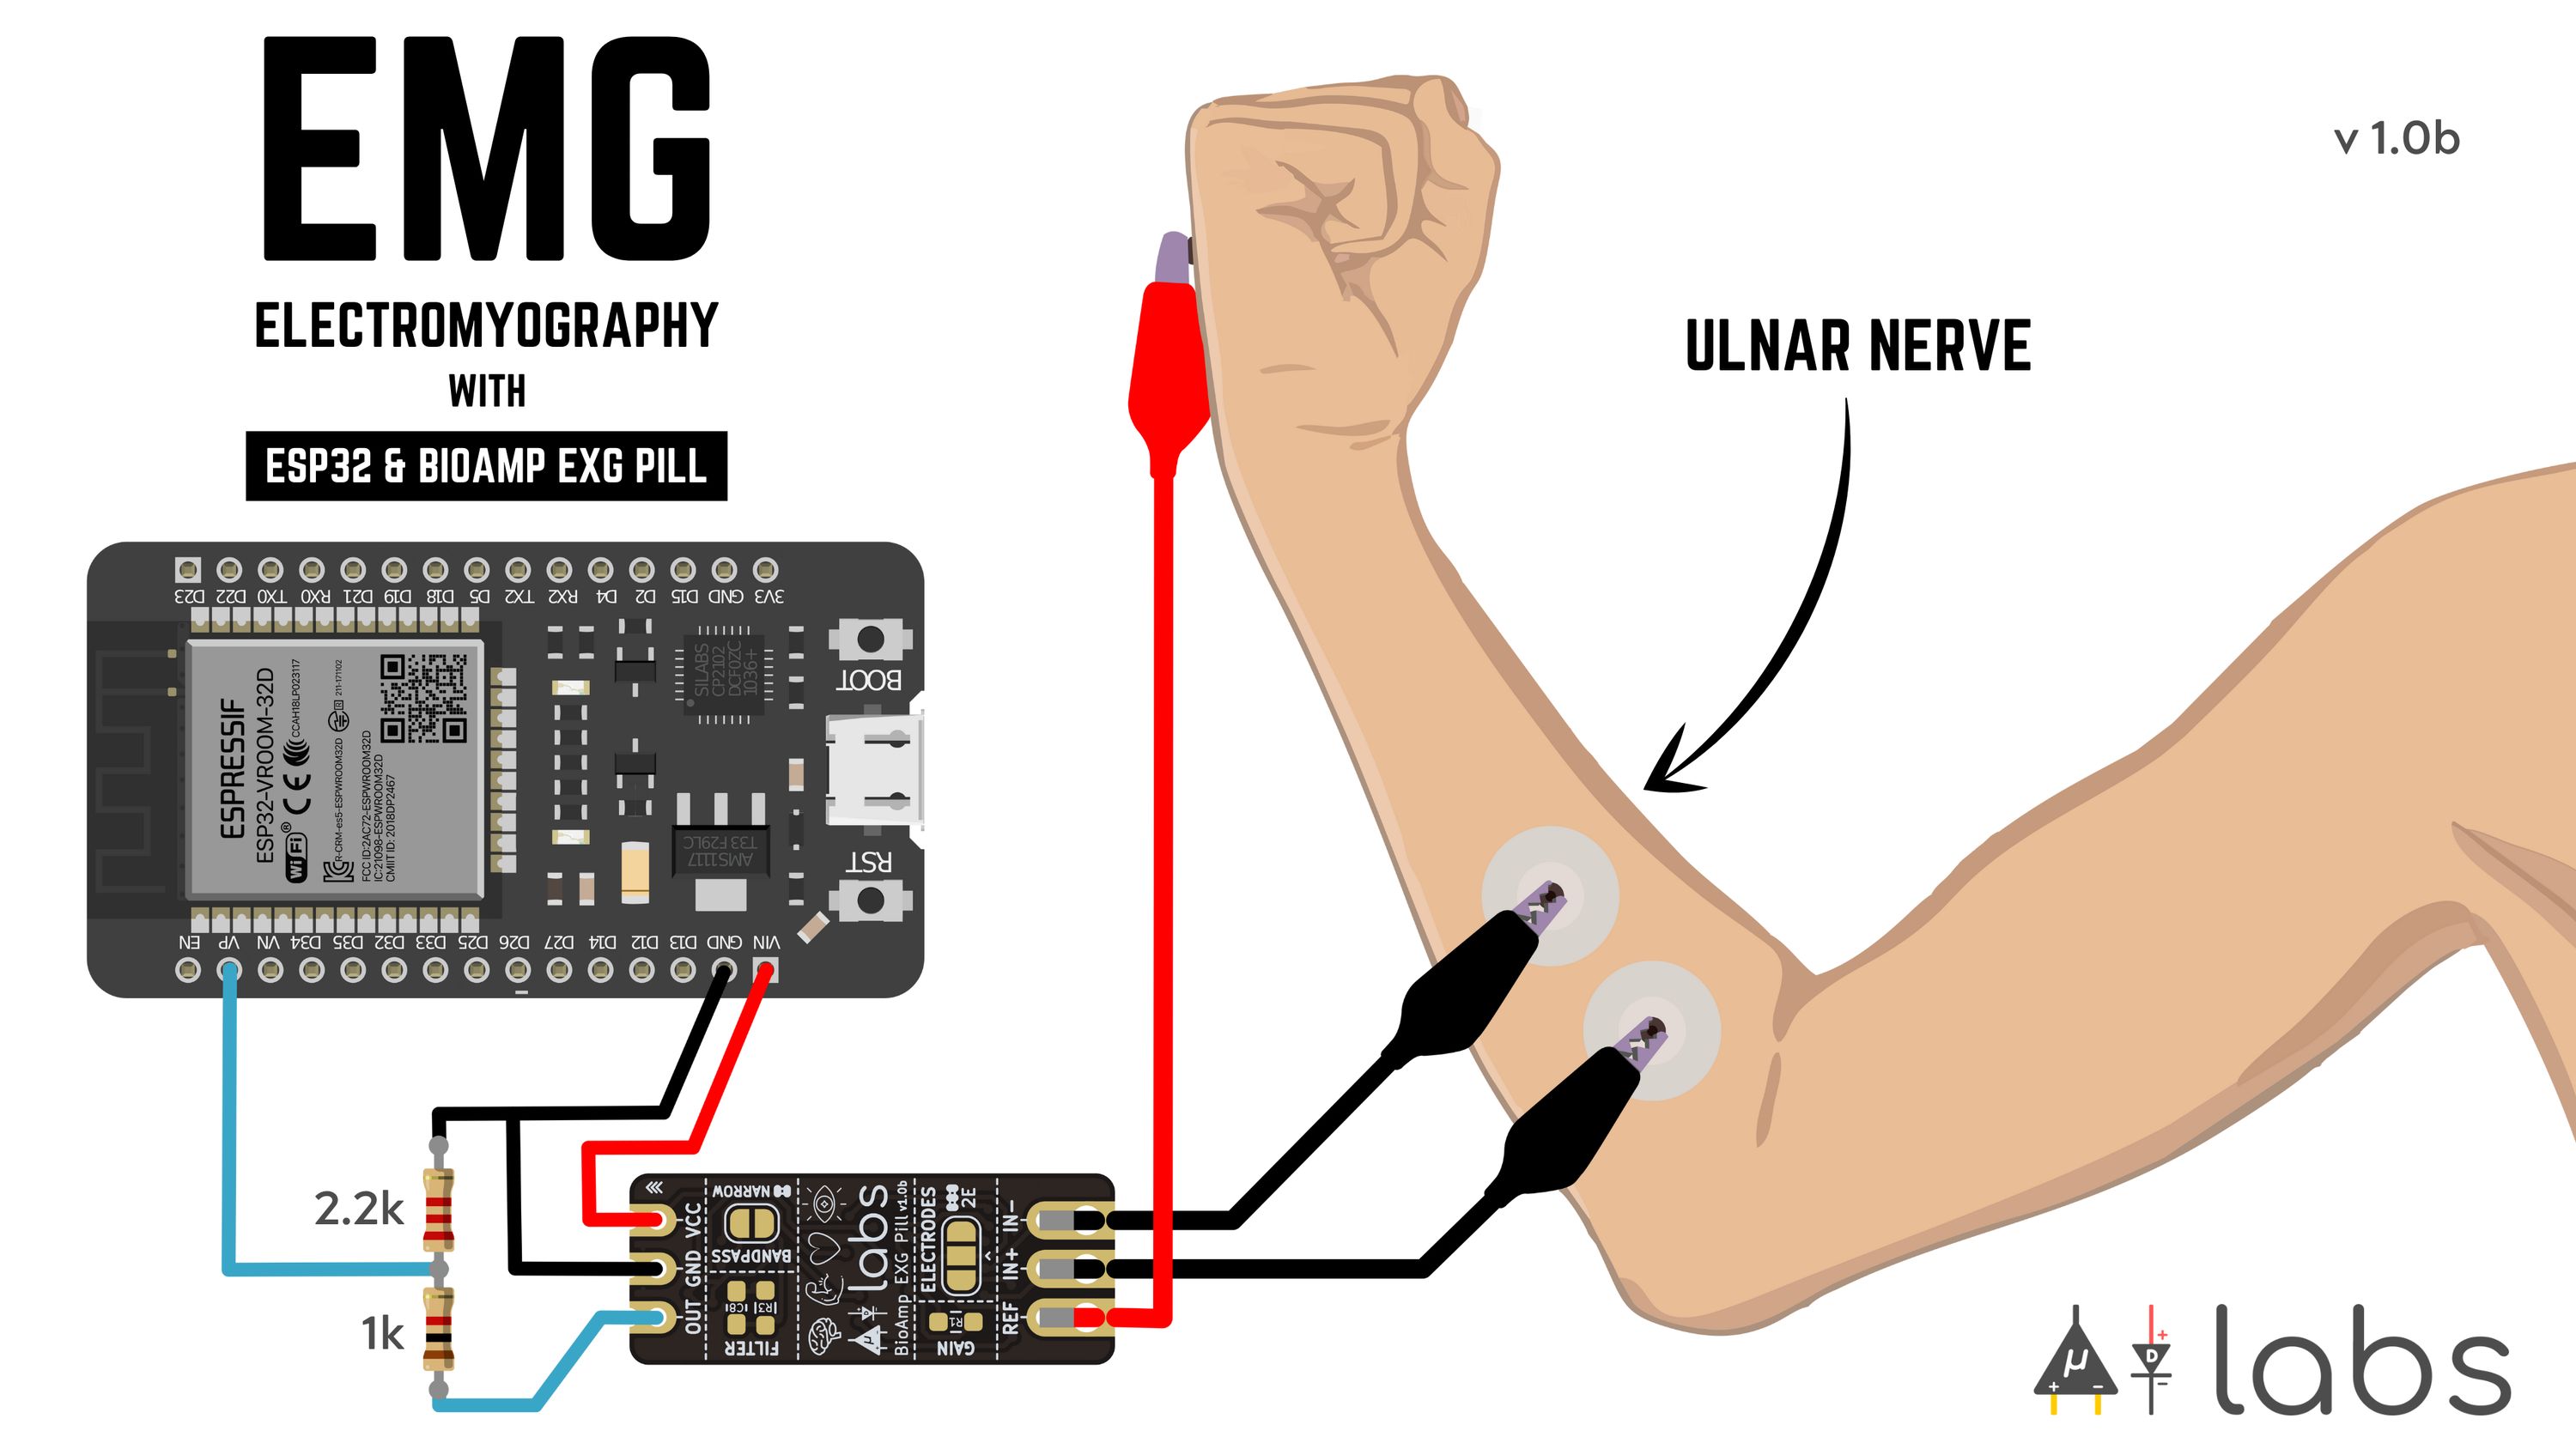
To make an Electromyograph for recording EMG signals using Espressif’s ESP32 and BioAmp EXG Pill, follow the circuit in the image below, flash the EMG filter arduino sketch onto your ESP32 development board and open up the serial plotter of your Arduino IDE.
Check out the Electromyography (EMG) Walkthrough project update for information about EMG filtering, envelop detection, servo control, and LED-bar control, as well as an exciting project demo that relies on EMG data recorded with BioAmp EXG Pill.
Electrocardiograph
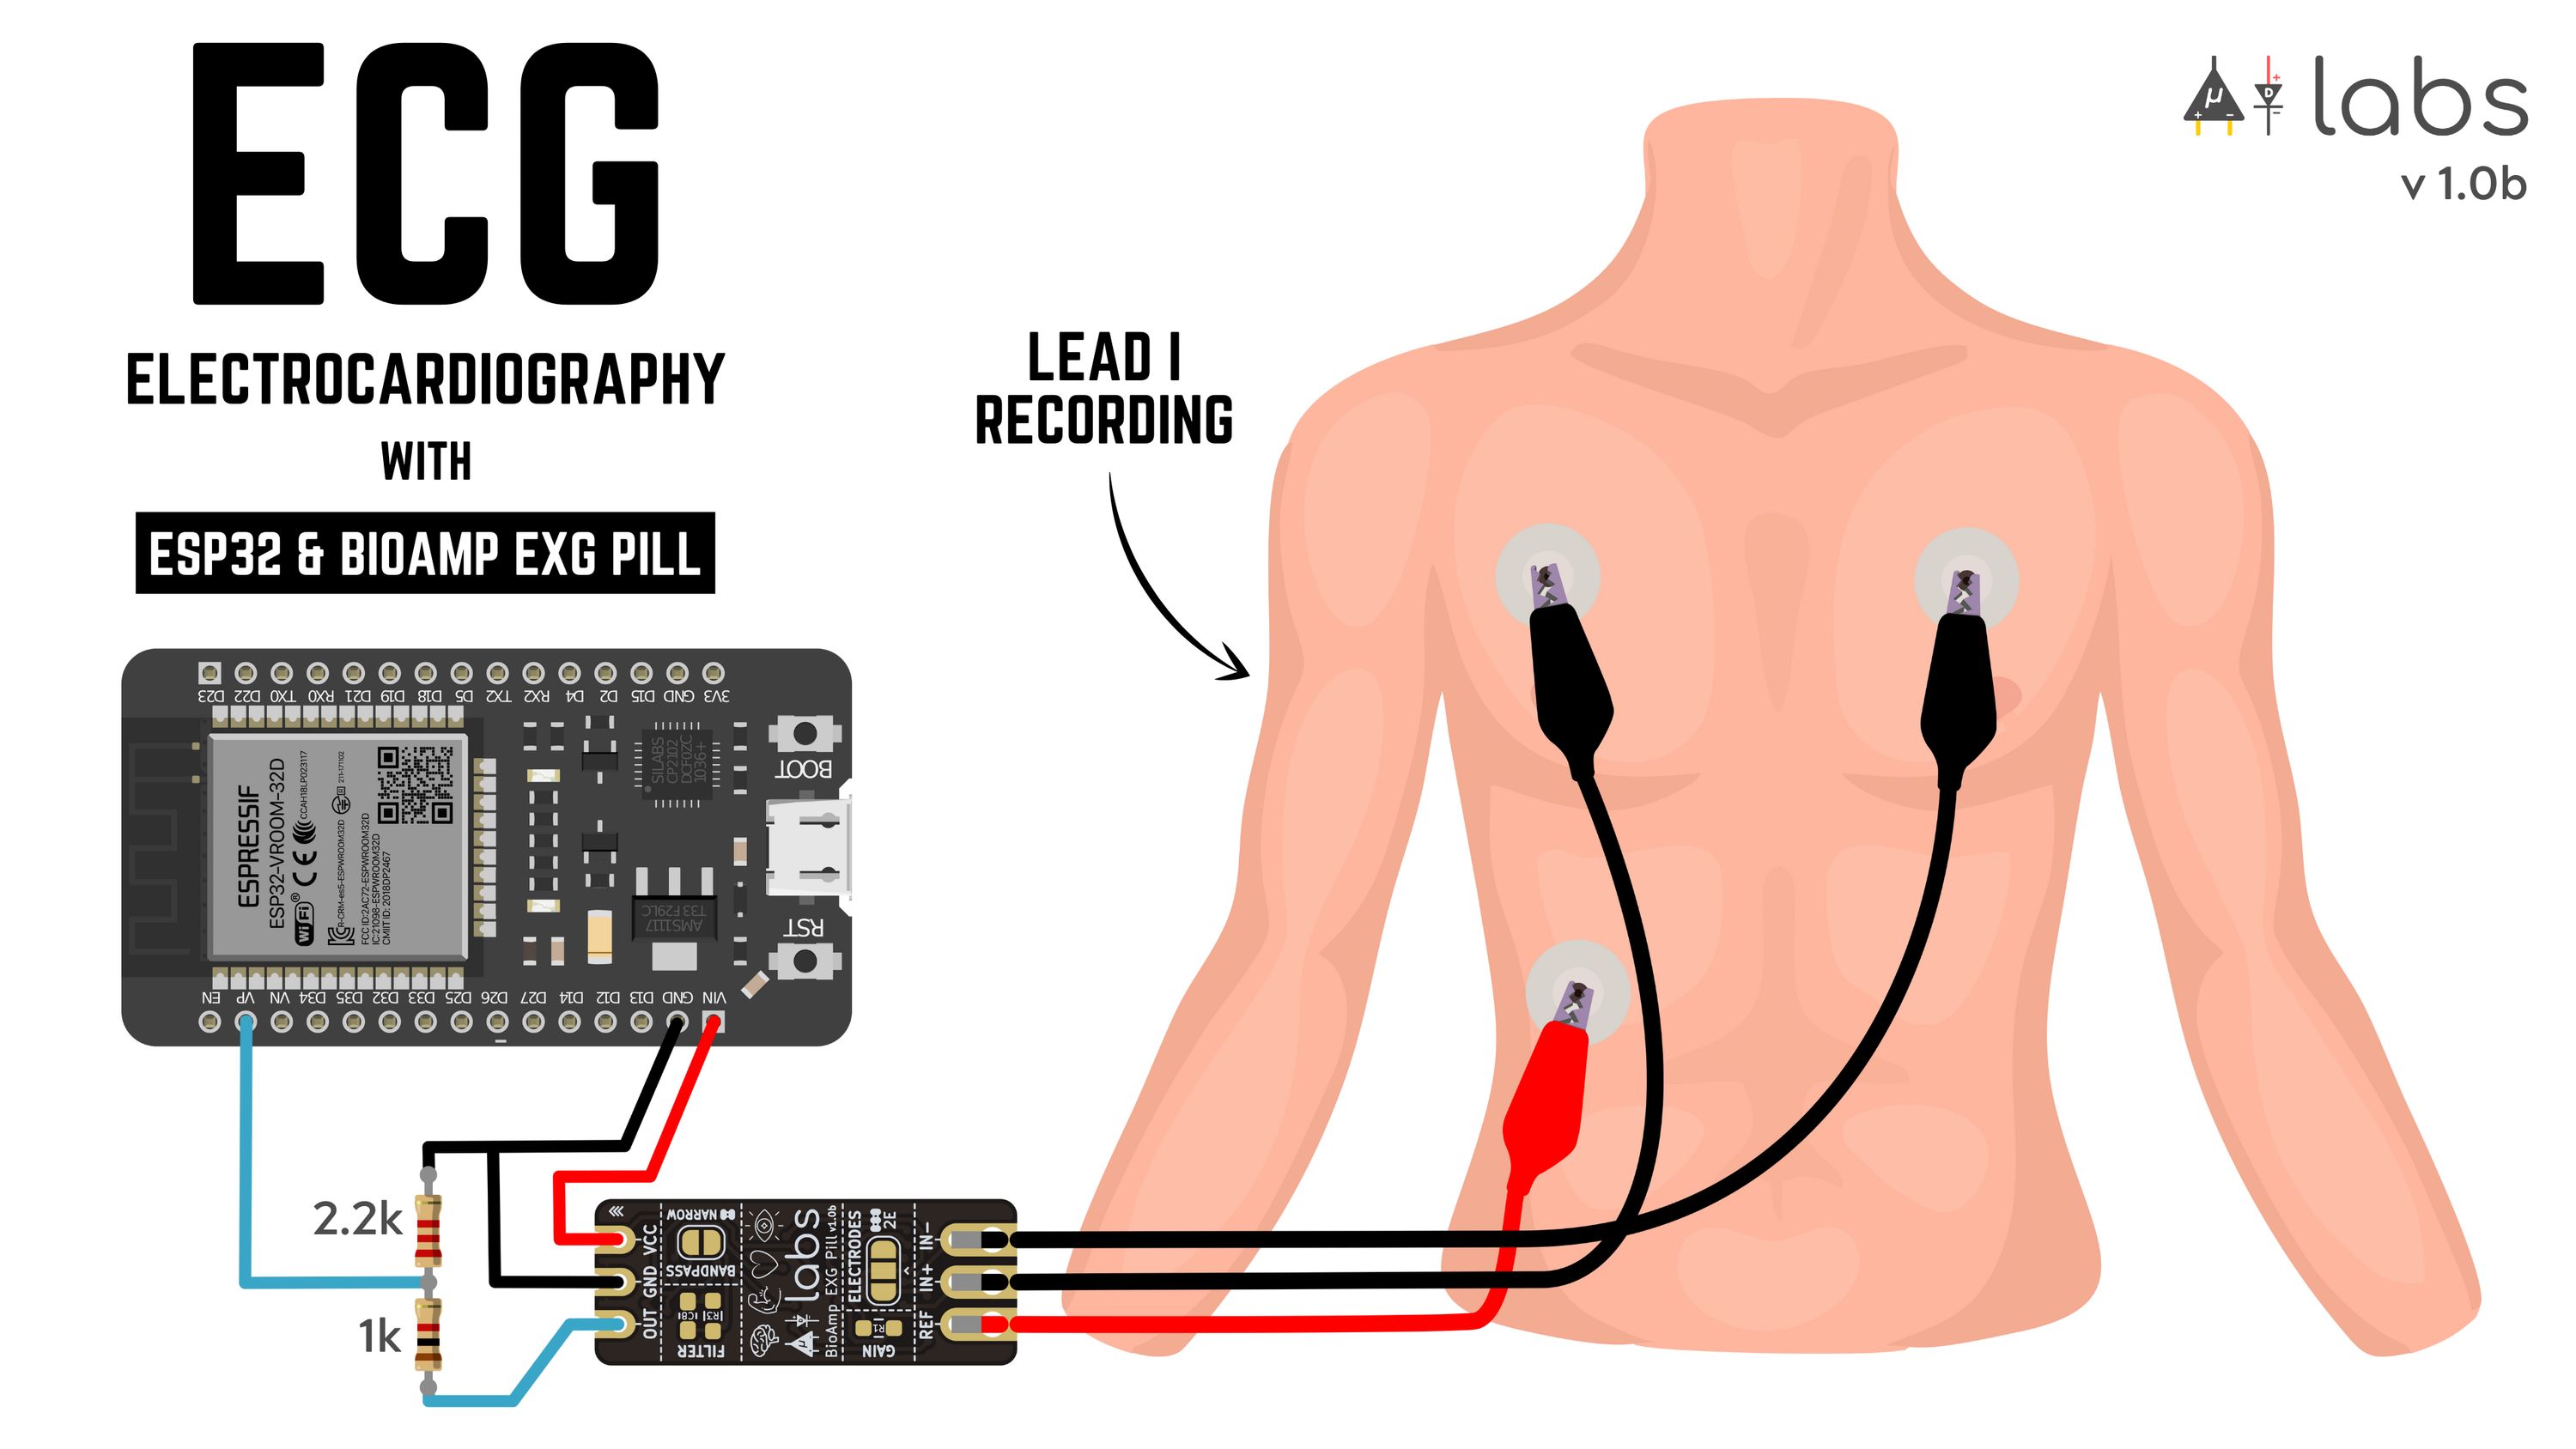
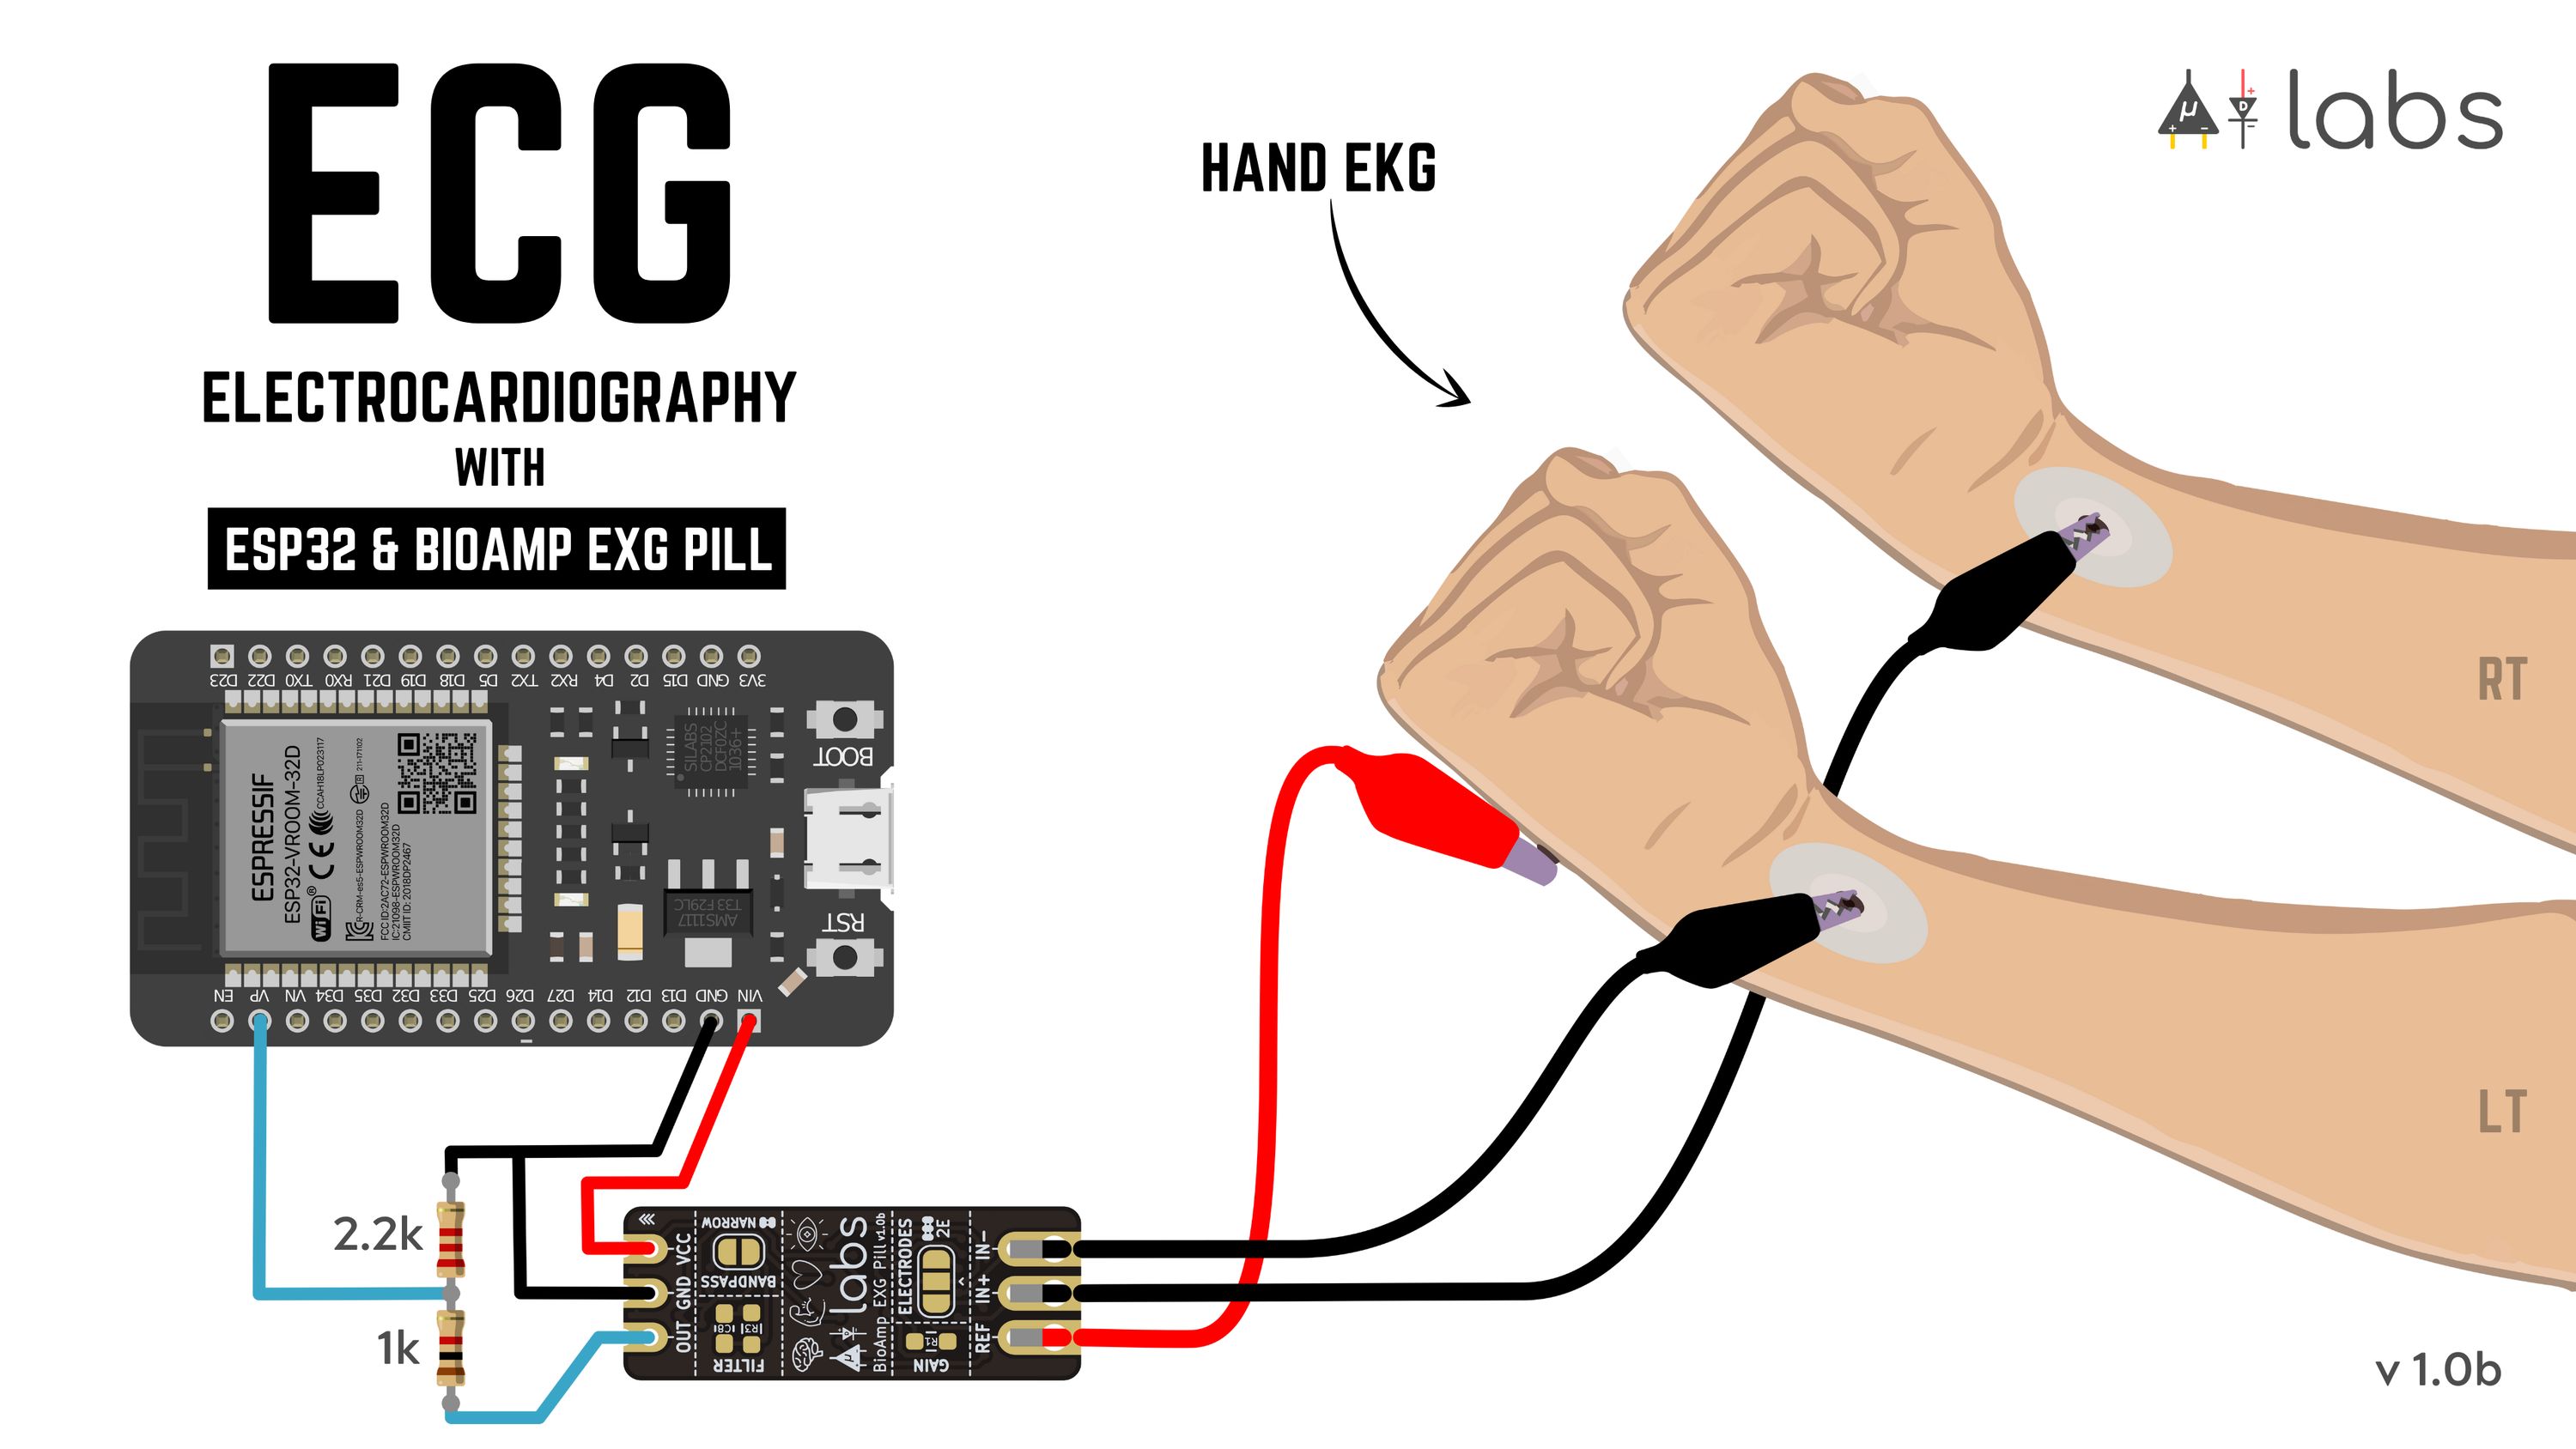
To make an Electrocardiograph for recording ECG signals using Espressif’s ESP32 and BioAmp EXG Pill, follow the circuit in the images below, flash the ECG filter arduino sketch onto your ESP32 and open up the serial plotter of your Arduino IDE.
Check out the Supportive Technology project update for information about ECG filtering and heart-beat detection, and more on ECG recording, with BioAmp EXG Pill.
Electrooculograph
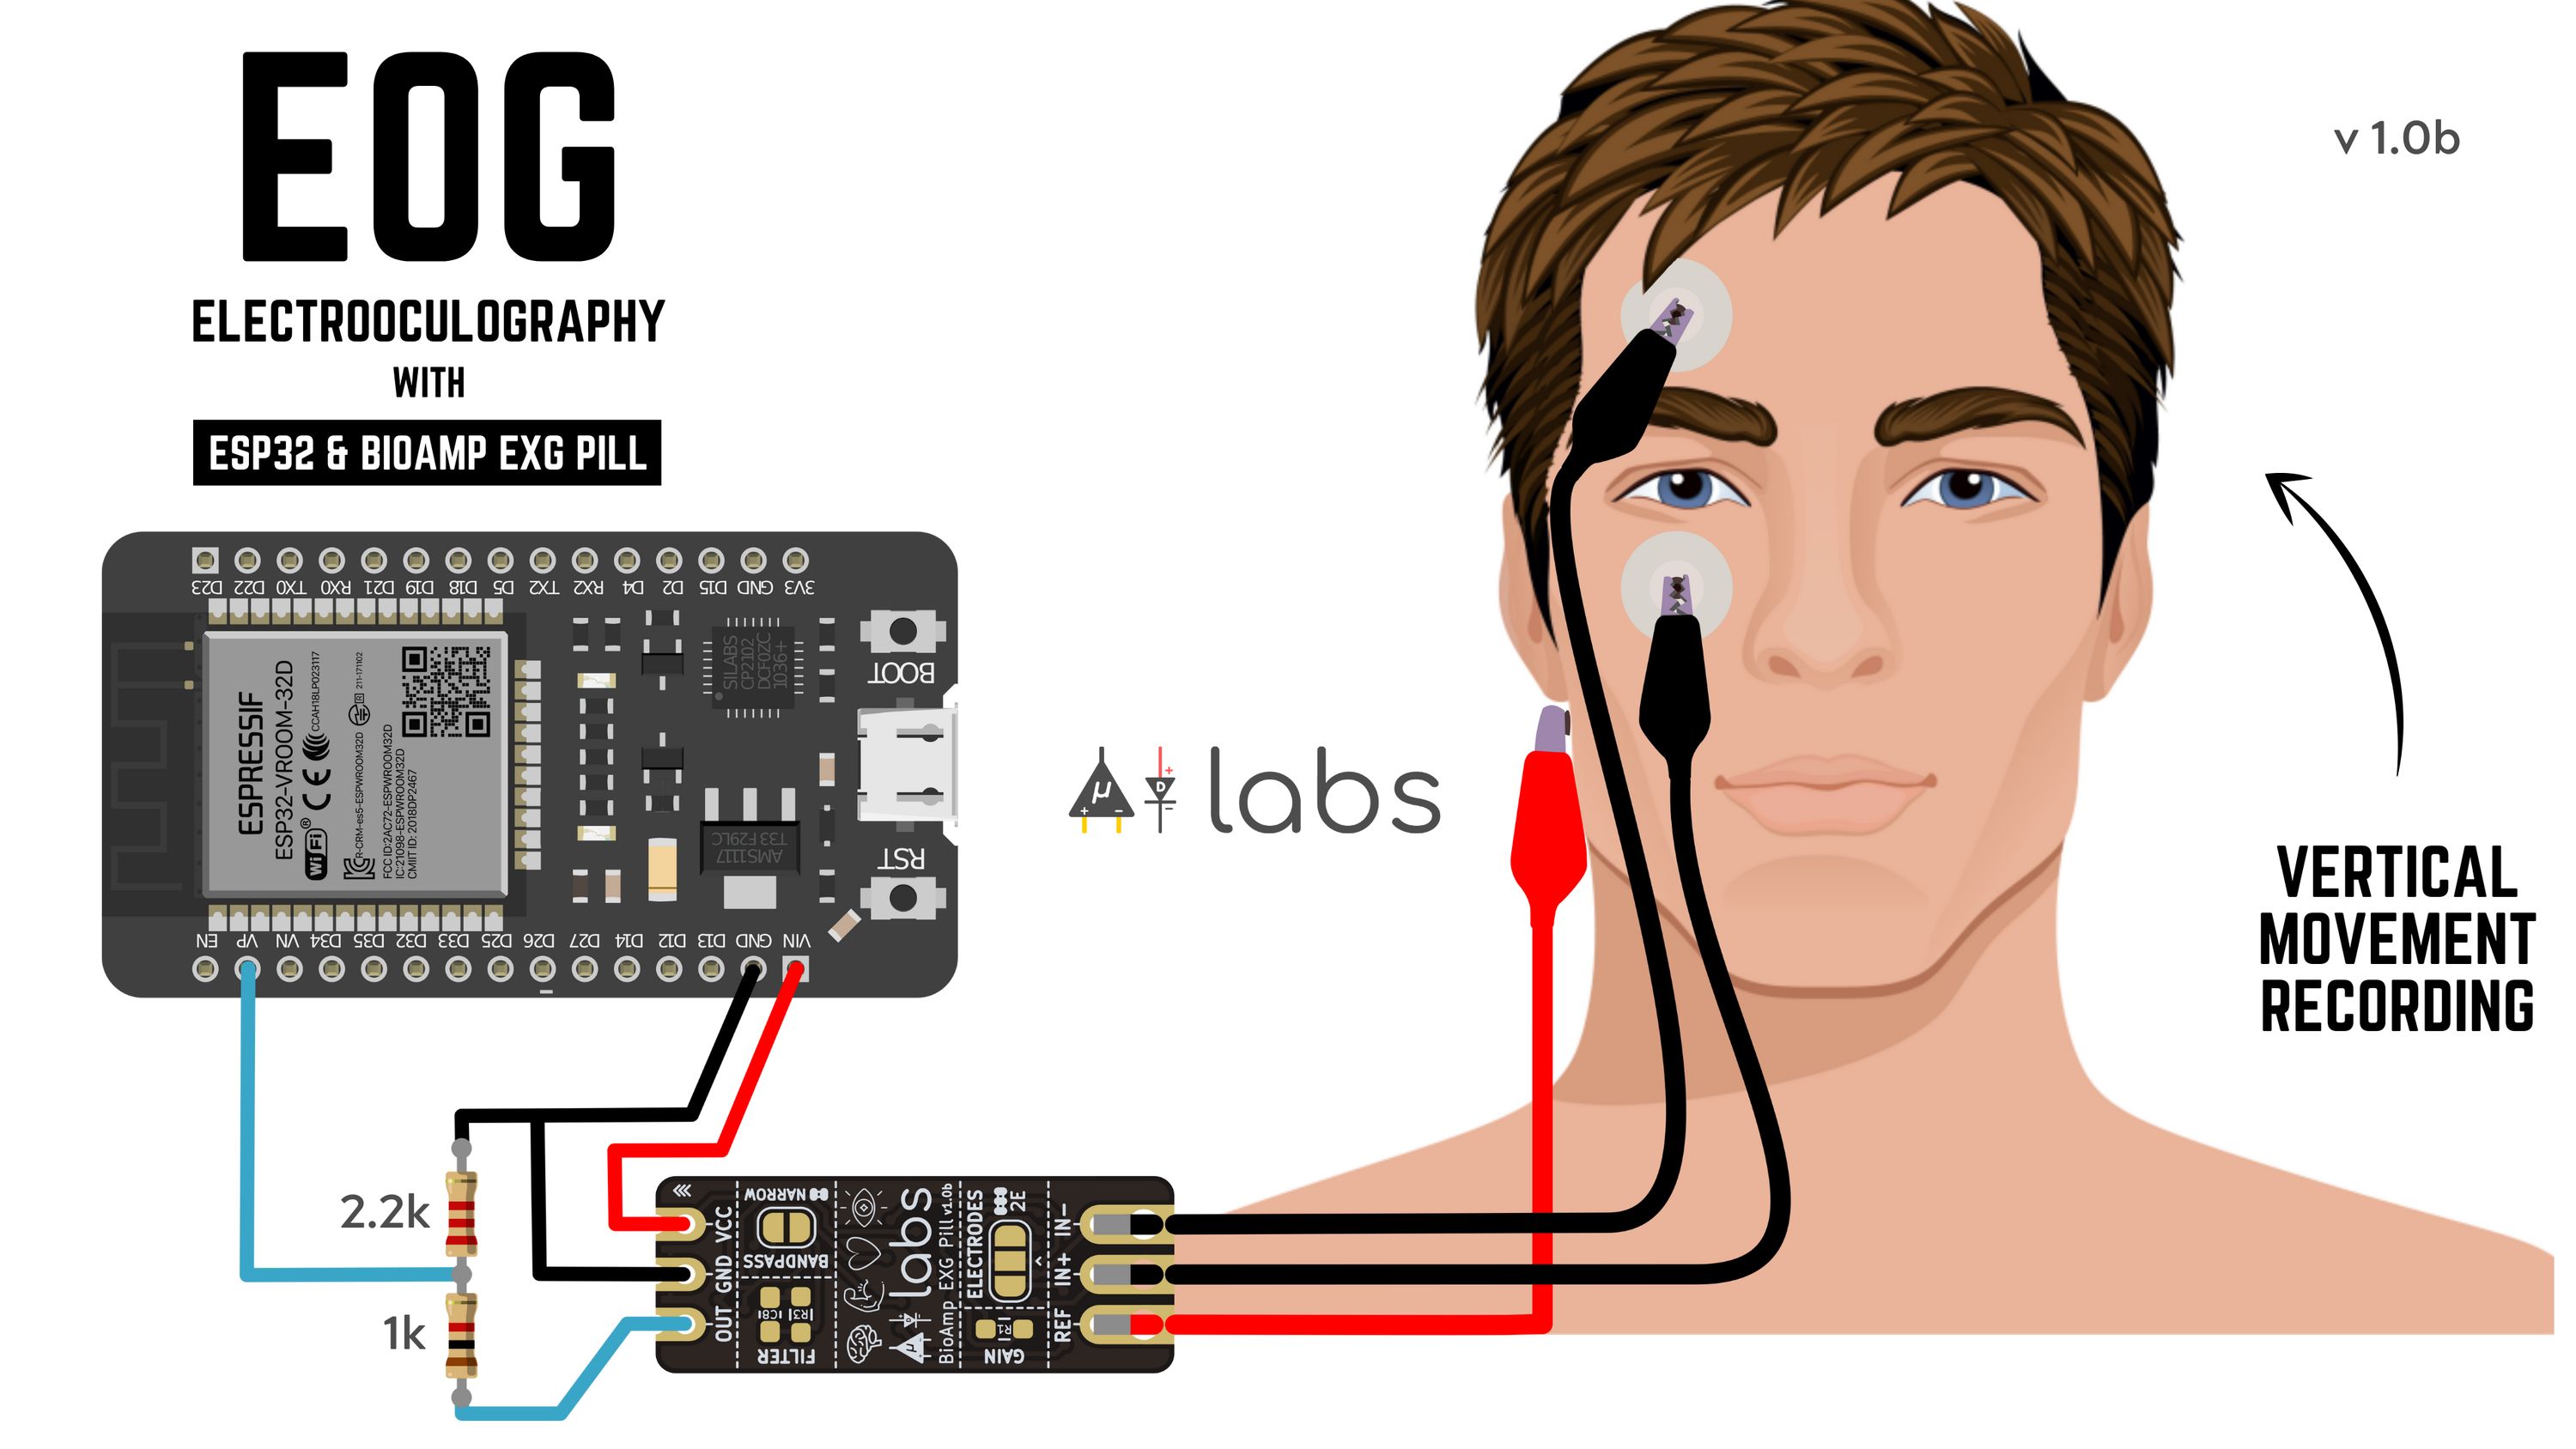
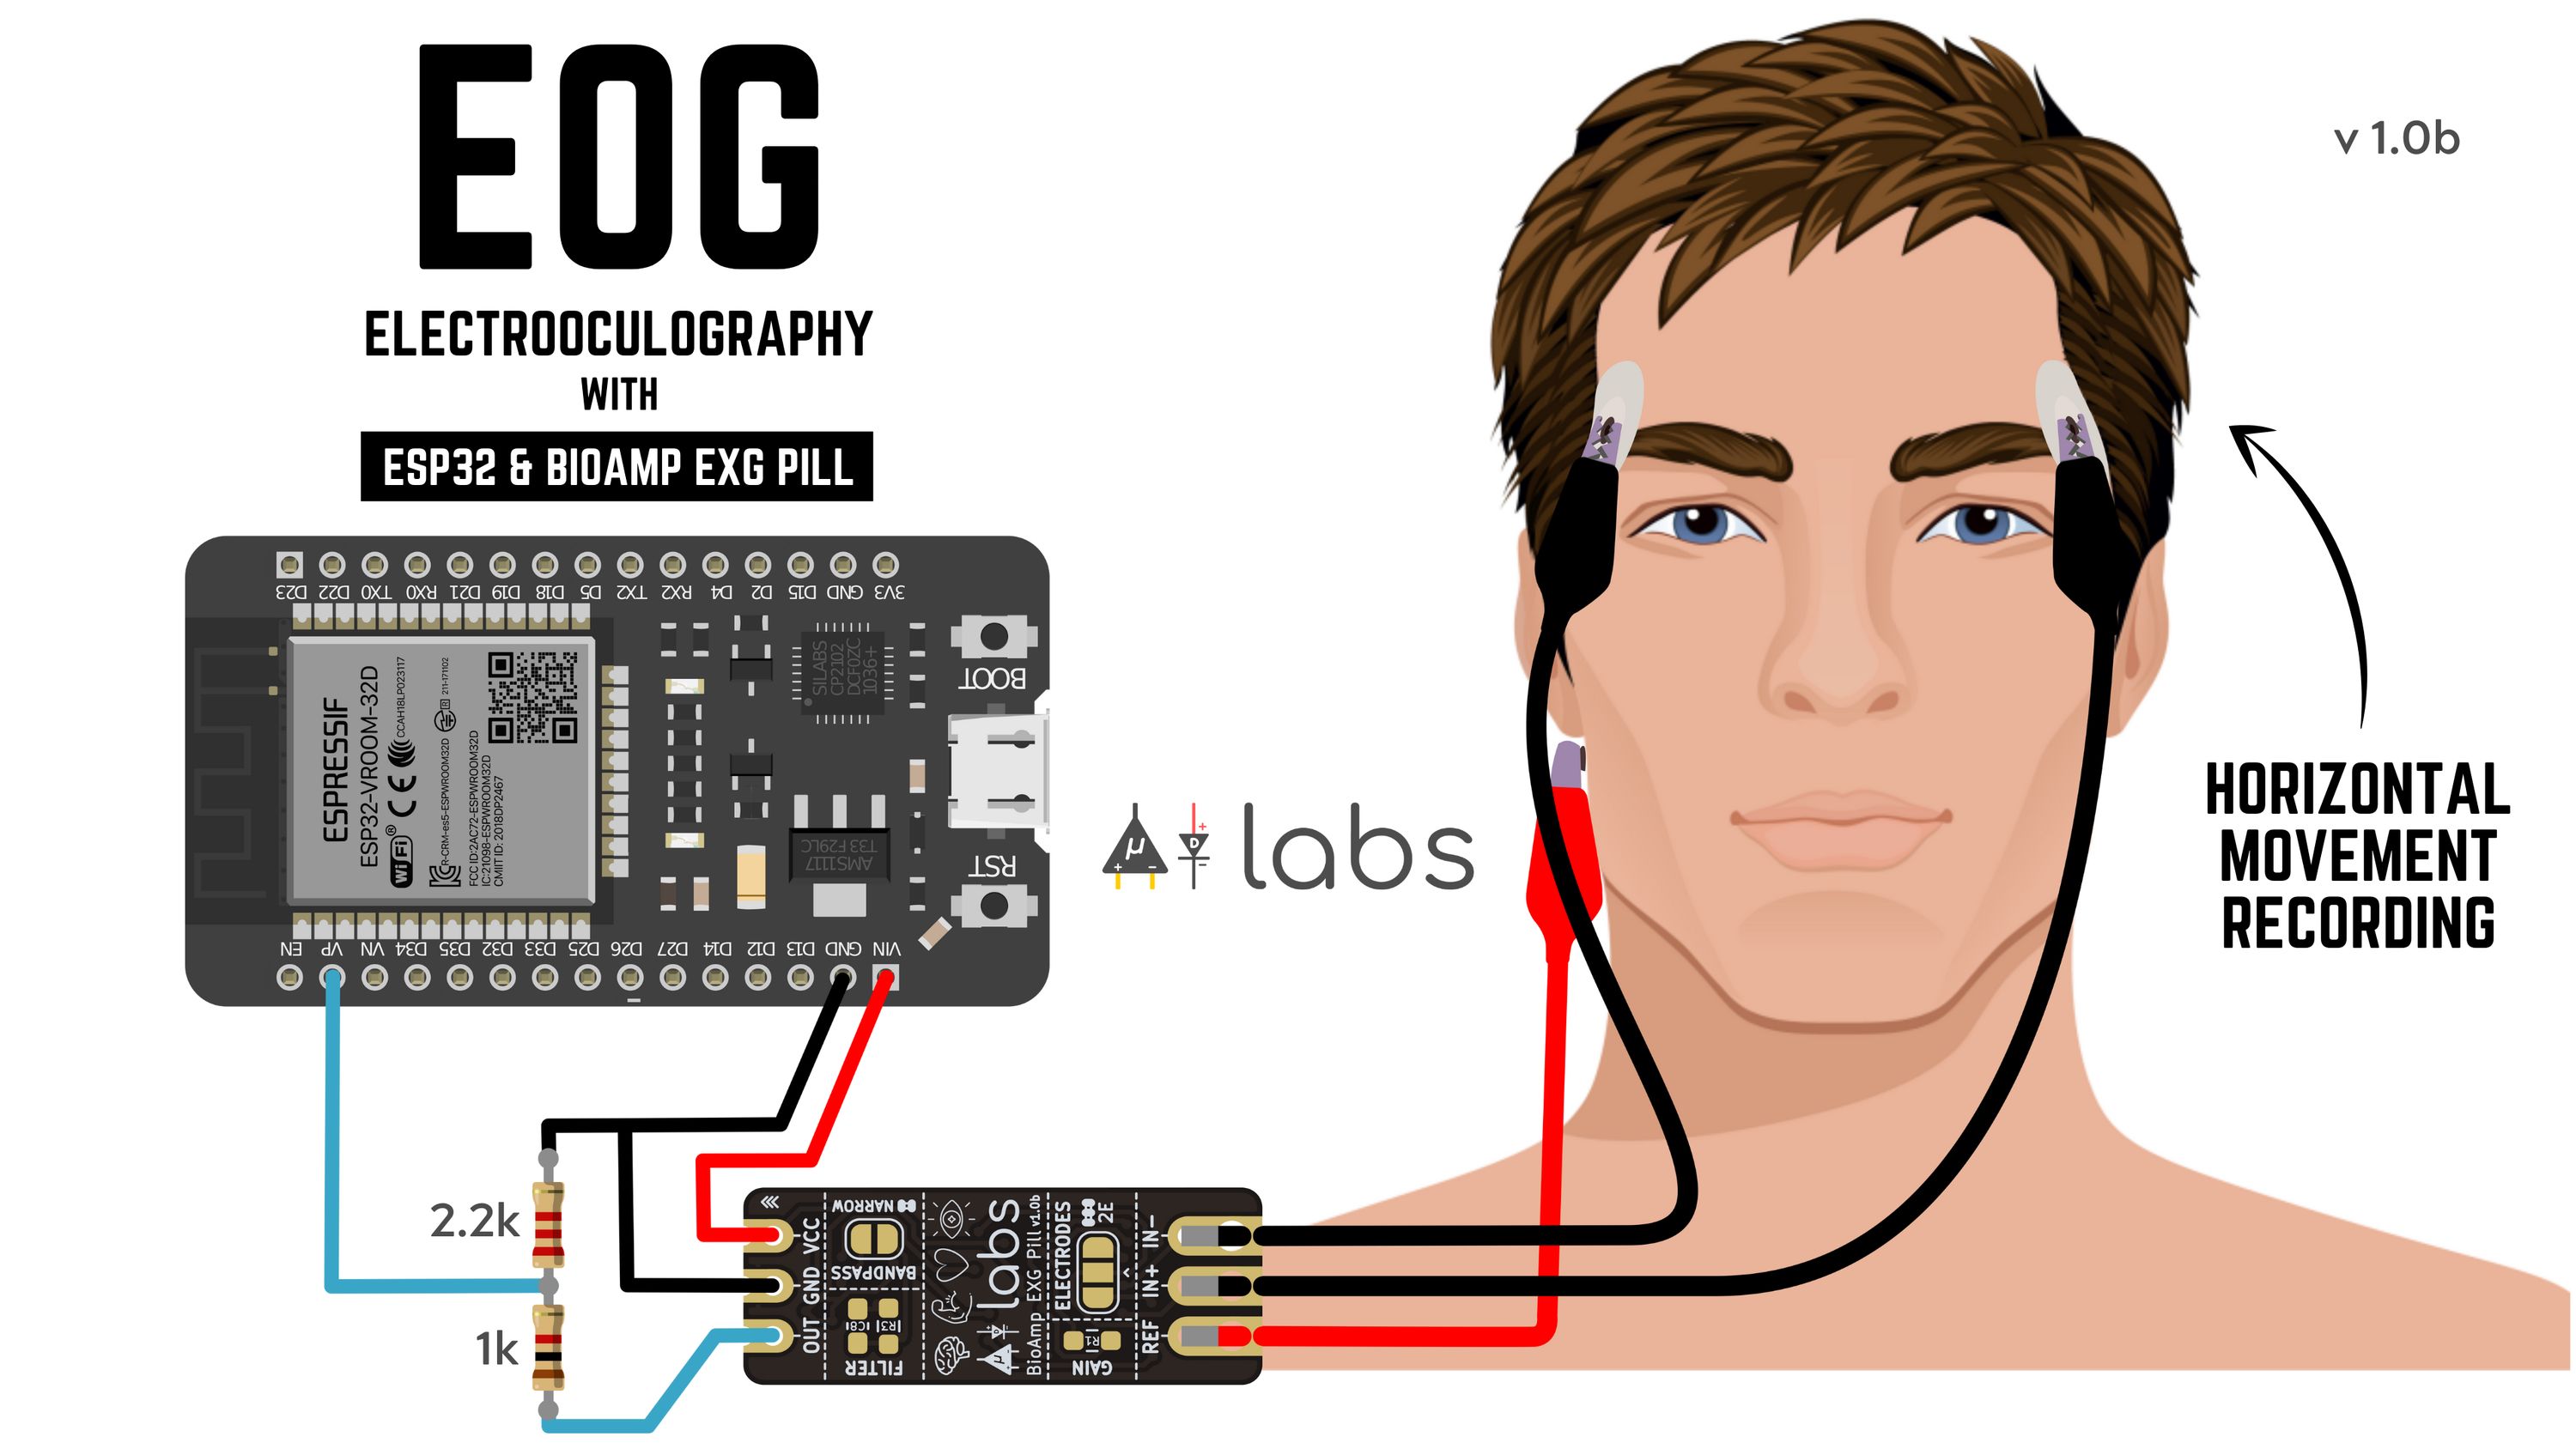
To make an Electrooculograph for recording EOG signals using Espressif’s ESP32 and BioAmp EXG Pill, follow the circuit in the images below, flash the EOG filter arduino sketch onto your ESP32 and open up the serial plotter of your Arduino IDE.
Check out the Electrooculography (EOG) Walkthrough project update for information about EOG filtering and eye-blink detection, and more on EOG recording, using BioAmp EXG Pill.
Electroencephalograph
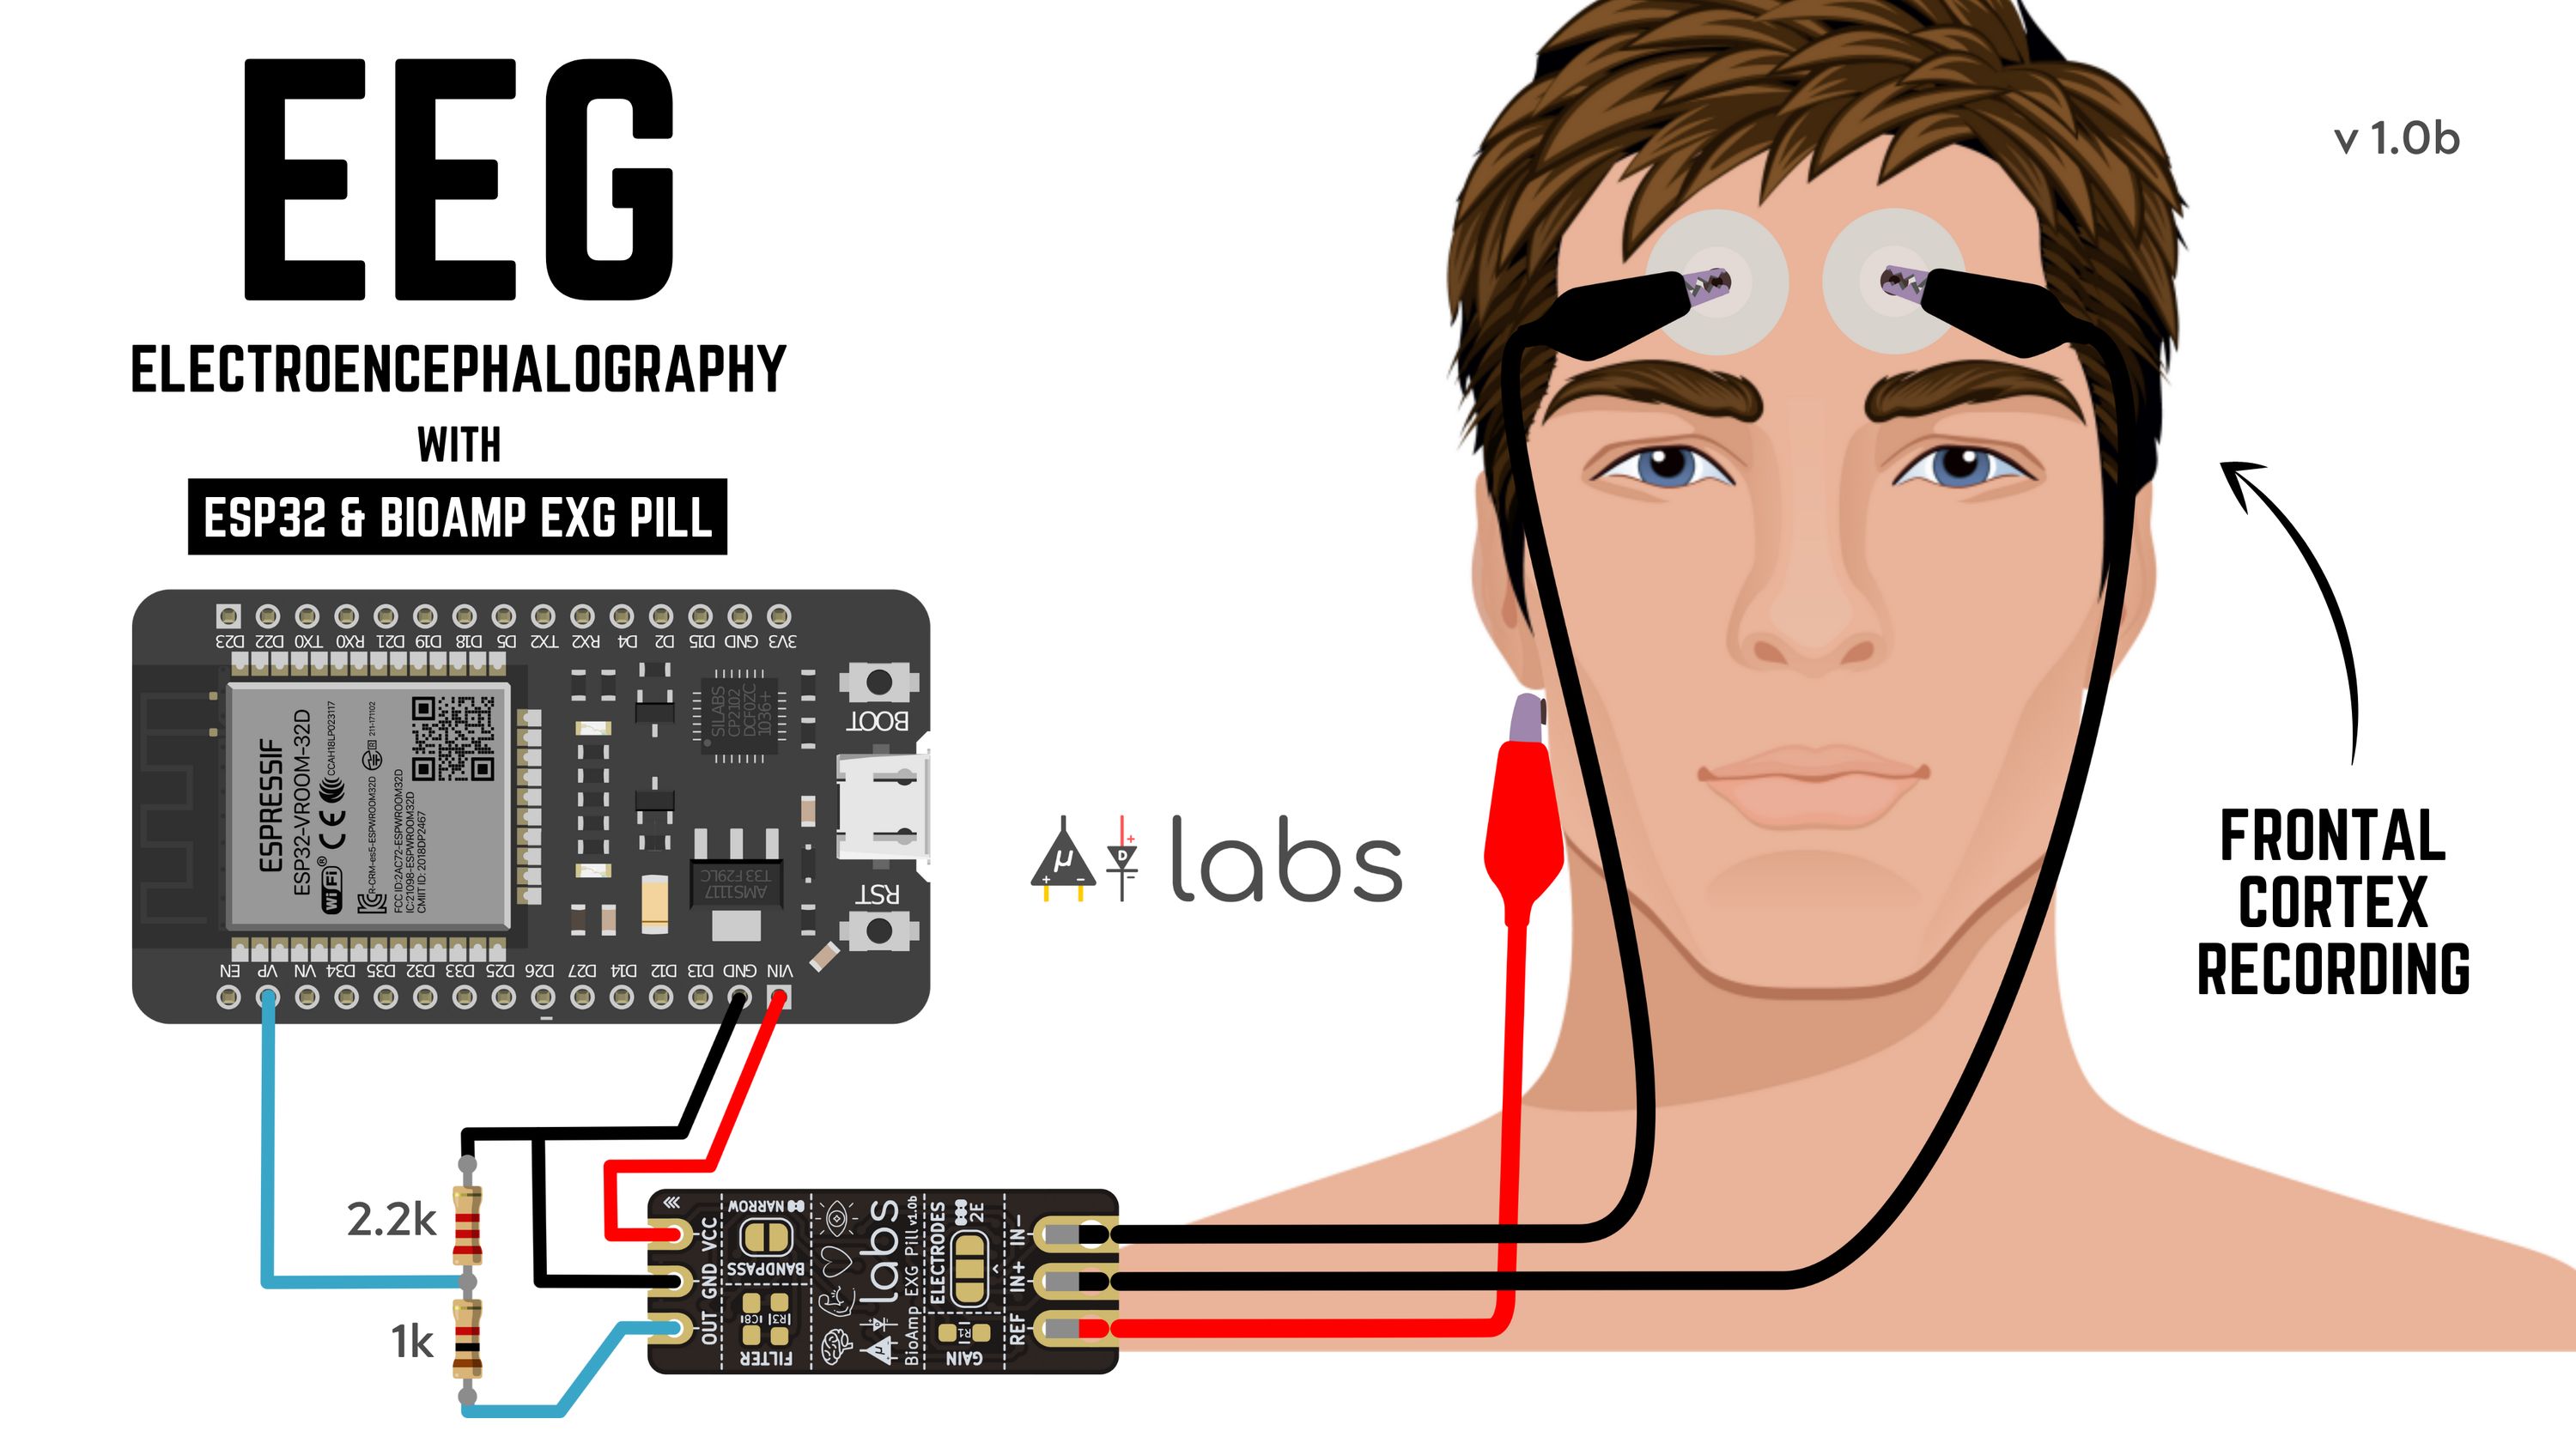
To make an Electroencephalograph for recording EOG signals using Espressif’s ESP32 and BioAmp EXG Pill, follow the circuit in the image below, flash the EEG filter arduino sketch onto your ESP32 and open up the serial plotter of your Arduino IDE.
Check out the Electroencephalography (EEG) Walkthrough project update for information about EEG filtering, and more on EEG recording, with BioAmp EXG Pill.
Blink eyes to click photos over Bluetooth and more!
A lot of awesome projects can be made with this setup, like EOG based photo clicker over BLE created by Padmalaya Rawal of PR Robotics. A new T-Rex Game controller can also be created by detecting eye blinks and sending spacebar signal over BLE to your Laptop or PC. Possibilities are endless and we are very excited to watch what you will be making with yor own BioAmp EXG Pill. In the coming project update(s) we will be enabling our ESP32 + EXG setup to connect mobile/laptop to show a user interface for visualization of the BioPotential signals and more.
EMG monitoring BioAmp EXG Pill (Review)
Recently a pretty awesome video has been published by EDISON SCIENCE CORNER on YouTube on BioAmp EXG Pill, in which he talked about EMG monitoring using BioAmp EXG pill and Arduino. He did a pretty good job in clearly showing how you have assemble the BioAmp EXG Pill for the first time and then how you can use it to record EMG signals.


