Since our last update, we’ve been busy adding new features to Precursor. Here’s a sneak peak at one of the major new features in the upcoming 0.9.9 release!
USB Device Support
The big upgrade to the hardware is the addition of a full-function USB device core. Previously, we had a Valenty USB core configured solely for the task of doing firmware updates. It runs completely autonomously of the CPU, so even if the CPU traps an illegal instruction on the reset vector, you could still update your device (just don’t mess up your SoC image!).
This “ring minus infinity” functionality is quite precious for development, where devices are regularly bricked by problems as trivial as a fat finger typo leading to an incompatible version of firmware being loaded.
The good news is that Precursor is built using an FPGA, so we can change the underlying SoC as we fumble through the release process. Instead of potentially breaking this critical path to recovering bricked units, we add a second USB device core to Precursor, along with a virtual multiplexer on the USB port. On boot, the Valenty debug core is selected, giving a window for device recovery. At runtime, applications can then select in the device core, once the system is confirmed to be stable. Finally, once we’re confident in our software, we can strip out the debug core entirely without affecting the application flow, thus locking out the security hole that a "ring minus infinity" debug core essentially represents.
For our second core, we decided to use the SpinalHDL USB device core. It’s made by Charles Papon, the same developer who created Precursor’s VexRiscv CPU. Charles was very generous with his time in helping me bring up the core. The SpinalHDL core is quite compact – it consumes about 2% extra device area – and has unique features such as a hardware linked list processor that has the potential for very high performance packet processing. Unfortunately, the Rust USB HID frameworks weren’t written for such bespoke features, so we’re using it in a simpler mode that more closely mimics the behavior of cores found in common microcontrollers such as the STM32. If you’re curious, here’s our device-specific HAL, written in Rust.
We’ve also prepared two HID drivers for Precursor that work with the new USB device core: a keyboard emulator, and a FIDO2 authenticator.
Keyboard Emulation
The keyboard emulator allows the Precursor to “type” characters into a host, paving the way for a password wallet where the passwords are domiciled inside the Precursor device, and typed on demand into password fields on a cable-connected host.
This is a middle ground between cloud-based password solutions and a simple list of passwords displayed on the screen that you type manually. You get the automation of being able to enter passwords on any physically tethered computer via the USB port, but it falls short of the convenience of being able to manage passwords on mobile devices anytime/anywhere (unless, of course, you’re willing to connect a cable from your phone to your Precursor device, and deal with the overall clumsy UX flow of external keyboards on phones). Thus this style of password management may not be suitable for everyday logins, but it might be a great fit for rarely used but high-value passwords that are too risky to trust to a cloud provider.
FIDO2 Passwordless Authentication
We’ve also integrated the drivers to have Precursor behave as a FIDO2 security key. This includes compatibility with the original U2F “touch to authenticate” protocols. Our FIDO2 stack is a vendor-in of the Google OpenSK FIDO2 reference stack, with modifications to target the "standard" RustCrypto libraries (instead of the "research-grade" libraries bundled in the default stack). The credentials are all stored in the PDDB, so you can transparently enjoy all the plausible deniability features that come with it, and it opens the possibility to on-device credential management.
Because we use Google’s OpenSK reference stack, we inherit one of the most standards-compliant implementations of FIDO2 available. Google also publishes a CTAP2 Test Tool which performs a battery of comprehensive stress tests to check a token’s compliance to the FIDO2 specification. For example, the popular Yubico Security Key only passes 58 tests, whereas Precursor is currently passing all 74 tests.
Of course, us passing “all of the CTAP2 tests” is expected, because we’re using Google’s reference OpenSK code. It’s a bit like asking a player to referee their own game; but, maybe that’s the point of open source reference code anyways – why rewrite what you can borrow?
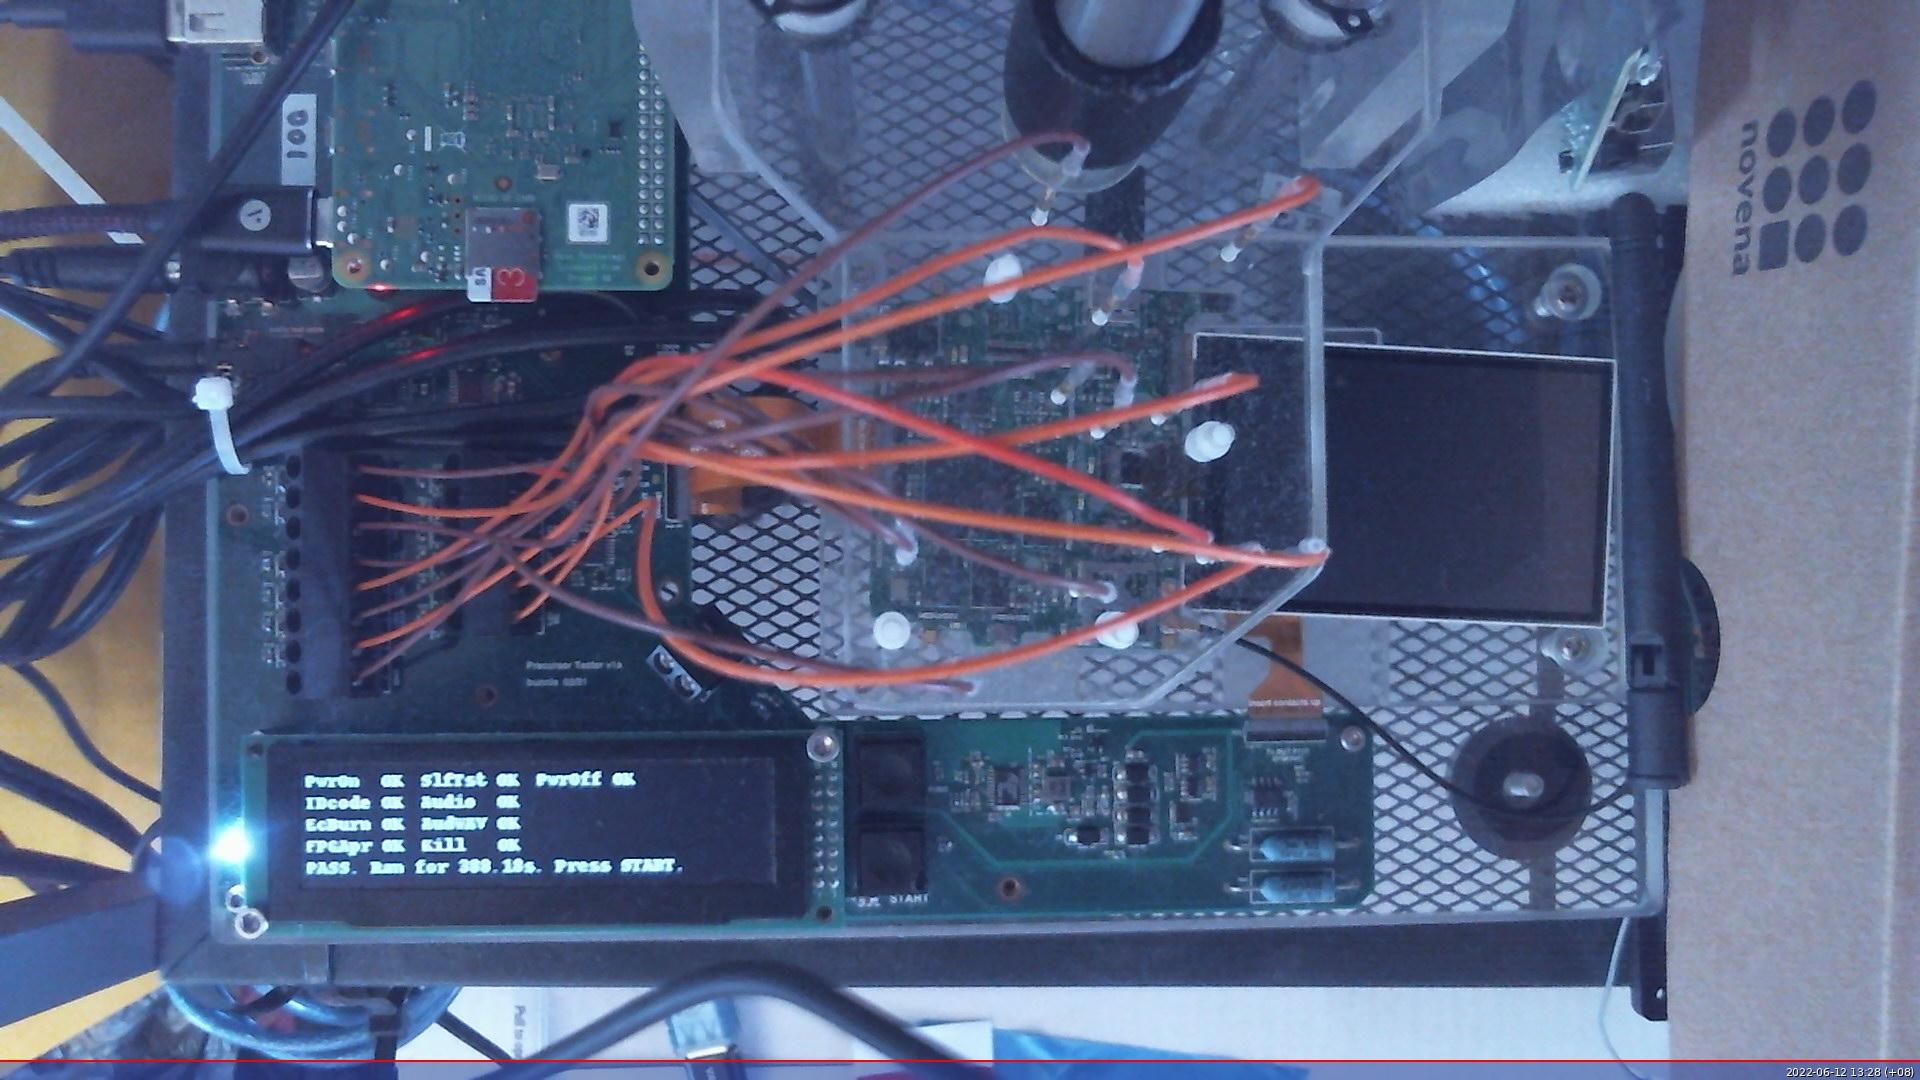
A side note that might be a subject for a whole different post: we have a “hardware in the loop” CI test flow for Precursor now, where every day a Precursor is taken from a “factory blank” state, imaged using the actual factory test procedure on a copy-exact replica of the factory test jig, and then tested against processes such as PDDB creation, network communications, and CTAP2 compliance – all done with actual hardware, not simulation. So if you’re ever curious about how compliant we are today to FIDO2, you can just check our CI stats. The magic is done with a pile of Expect scripts, that you can browse here.
Above: an example webcam snapshot taken after every factory test run using a replica of the factory test jig, directly wired to our CI build box.
Enhanced UX Flow for U2F and FIDO2
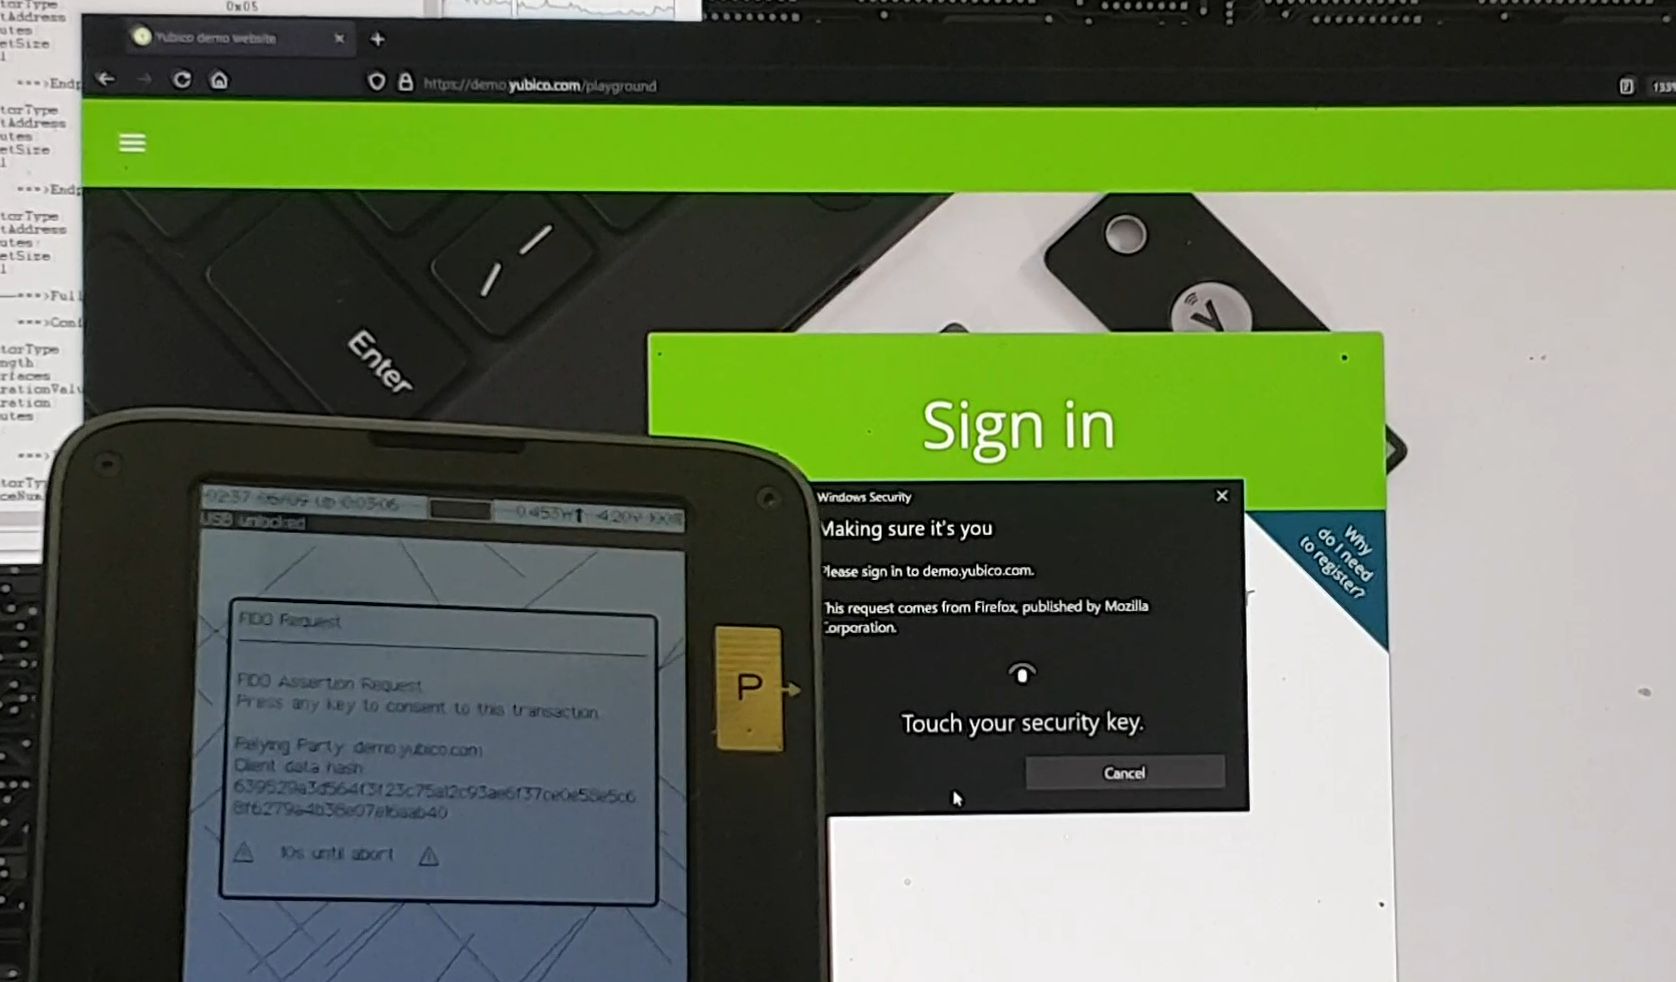
Because Precursor has a screen and a keyboard, you can know why you’re touching your security token, instead of “it’s flashing an LED, therefore I touch it”. The original U2F protocol wasn’t built for devices with displays, so you have to manually name your applications after you’ve registered them; but the newer FIDO2 supports richer devices, and thus we can automatically display details about authentication requests:
Above: signing into a website using the FIDO2 feature on Precursor
Of course there’s still a lot of work to be done on the UX ergonomics, but if you’re curious for a preview of where we’re going, here’s a short movie to whet your appetite.
Join the Conversation!
All the features mentioned in this update are available on the main branch of Xous. Note that you will need to update your SoC image to the latest build before applying the Xous OS update. This is a two-step update process that has yet to be automated – the simple “update_ci.sh” scripts won’t be reliable, as hardware registers have shifted around due to the addition of a second USB core. You need to apply the SoC update first (which requires you to enter your update password so you don’t lose your secrets!), and then the Xous OS update, built to target the new SoC register map. Building a tool to guide users through this more complicated update flow is one of the many items gating the release of Xous 0.9.9…
If you want a preview of everything that’s in progress for 0.9.9, check out the release notes in the main branch. It’s really exciting to see all the new and very active community members coming together to help shape this upcoming release. Thanks to everyone who is so enthusiastically contributing! Your energy and engagement is raw fuel that helps keep me going through the long slogs, and your advice and counsel has guided the product to a better place for everyone.
We invite you to join the conversation if you have questions, comments or contributions. We’ve expanded our community beyond our original Matrix chat channel to include a Matrix “Space”, which you can join at this link. The Space features multiple special-interest channels, making it easier for those interested only in certain facets of the project to follow along.
Happy Hacking!
-bunnie


