Project update 9 of 9
A Software Update, an Upcoming Hardware Variant, and a Repair Guide For an Issue Present in Some Loud ESParagus Units
by AndriyIt’s been a few months since the campaign wrapped up, and I wanted to catch you all up on what’s been happening! First off, we managed to get all orders shipped out well ahead of schedule, with no major issues along the way.
With that done, I’ve been gathering some initial feedback from the community and have some exciting updates planned for the product line moving forward. More details on that below!
Software Update: TAS5805M DSP Configurations Available for Louder Esparagus
One of the coolest things about the TAS5805M DAC we’re using in the Louder Esparagus is the built-in DSP. That’s the real magic of having a digital input: not only does it keep out noise you’d get with analog, but it lets you process audio digitally before it hits the DAC.
The DSP can handle a lot of heavy data processing right on the chip, freeing up your CPU for other things. And, if you’re working with something like a Raspberry Pi (or especially an ESP32), that’s a huge plus since these tasks could otherwise eat up serious CPU resources.
But here’s the catch: as of now, this part of the DAC is mostly untapped because TI hasn’t exactly made it easy for us.
Here’s what I mean (rant incoming): To access the configuration software, PurePath, you need to (A) be a recognized hardware manufacturer, (B) go through a whole license application and approval process that takes weeks, and (C) find out that it only works with TI’s evaluation board, which costs $250 if you can even get your hands on one. Otherwise, you’re left with a list of I2C commands to program it yourself. It’s no wonder this feature is underused!
Rant over—here’s what you can actually do with it:
- Flexible input mixing with gain control
- A 15-band EQ with lots of filter options
- Three-band Dynamic Range Compression (DRC) with customizable curves
- Automatic Gain Limiter (AGL) that you can configure
- A soft clipper
- And a few other handy features
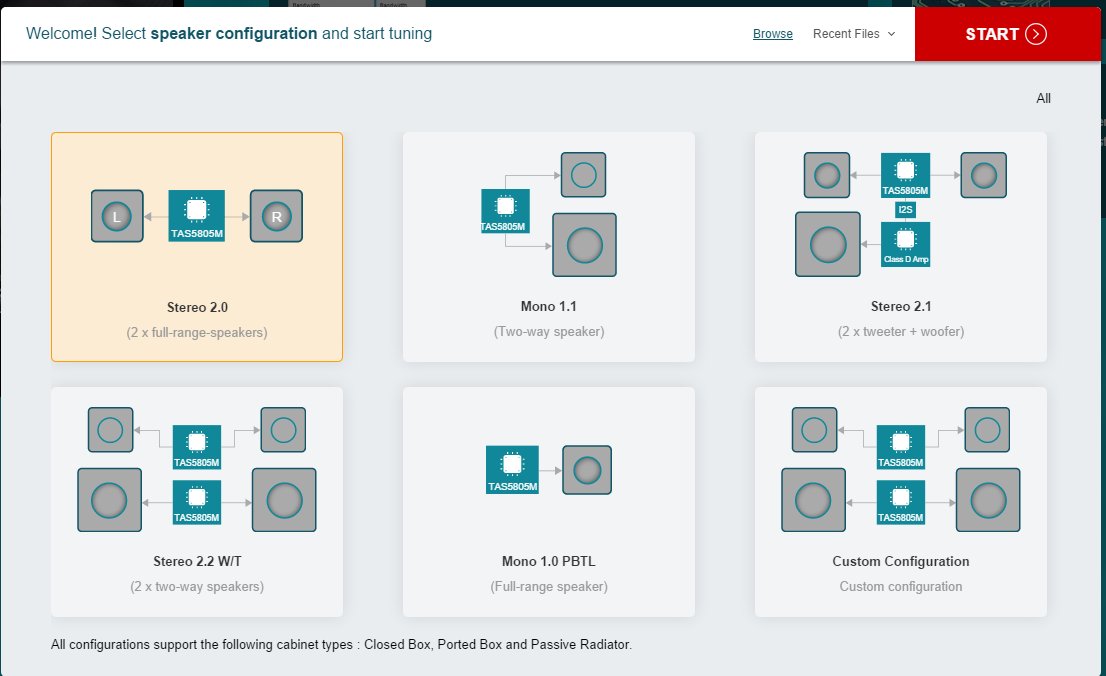
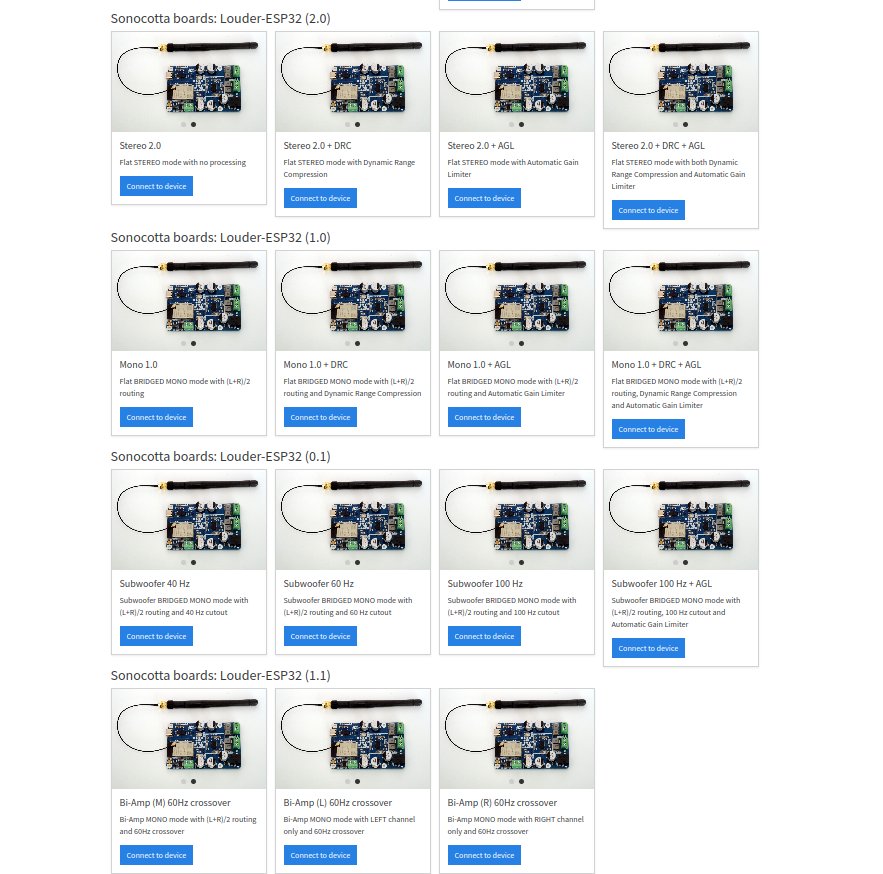
Right now, it’s all experimental on the Esparagus. In an ideal world, you’d be able to adjust these settings to fit your speaker setup, enclosure, and even room acoustics perfectly. But with TI’s restrictions, I can only provide a limited set of configurations for the most common setups:
- Stereo mode with DRC (loudness) and AGL
- Full-range Mono mode with DRC and AGL
- Subwoofer Mono mode with filters for 40, 60, and 100 Hz cutoff frequencies
- Bi-Amp mode with a few crossover frequency options
These are all ready for testing! I’d love to get your feedback as I work on porting this to more software options.
- [X] - Bare I2S TAS5805M library
- [X] - espragus-snapclient software
- [ ] - squeezelite-esp32 - in my to-do list
- [ ] - flexible configurations with on-the-fly configuration changes - in consideration
Hardware updates
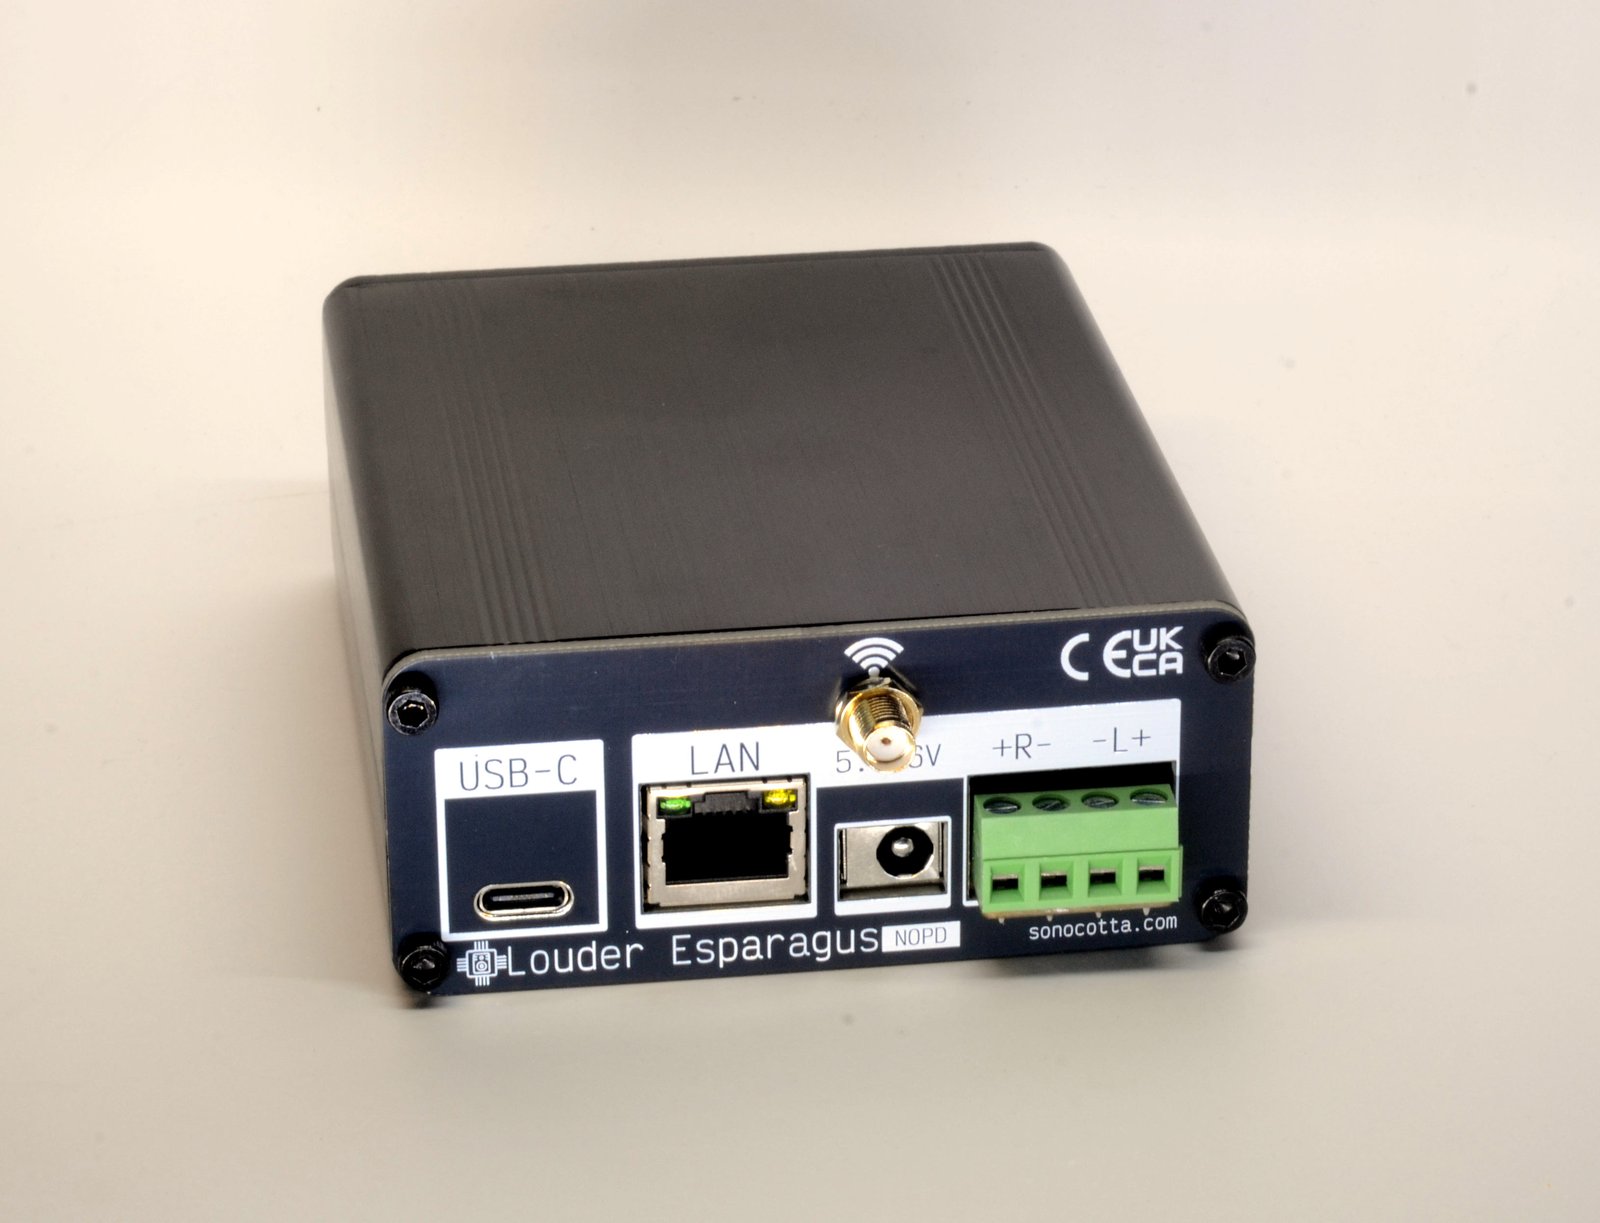
Louder Esparagus available in the NOPD variant
Another issue some people have run into is with power adapters that aren’t fully PD-standard compliant. In most cases, the worst that happens is the PD chip doesn’t trigger the 20 V mode, so the Esparagus runs at around 5 W per channel (which you might not even notice).
However, one person reported that an older adapter somehow triggered just 1 V on the USB-C power line, shutting down the Esparagus shortly after plugging it in. Thankfully, we’ve confirmed that it works correctly with newer laptop adapters.
The “hammer-type” solution I’m working on is a new NOPD version of the Louder Esparagus that lets you use a barrel power jack to supply raw voltage directly. The catch? Standard 2 mm pins can’t handle high currents, so I’ve gone with a 2.5 mm pin instead — it’s a bit unusual but still common enough in the laptop world.
With this setup, you can supply more than the 20 V limit of PD, giving you a bit more power for the speakers. You probably won’t hear much difference (thanks to the way human hearing works), but it could help larger speakers that need a bit more power to really “open up.”
Other than that, the NOPD version works just like the PD version, no software changes are needed.
Errata on the Loud Esparagus
Like with any project, there’s been a small hiccup, but the community helped spot it, dive into the details, and find a fix.
Here’s the issue:
Some units are showing weak WiFi (signal strength is around -10 to -20 dB lower than expected) when there’s no serial monitor attached. With the serial monitor connected, WiFi works fine, which makes it tricky to debug since everything seems okay while it’s plugged in.
Impact:
For affected units, you might notice audio stuttering or breaking up, even close to the router. Plugging in the serial monitor over USB makes it work as expected again.
Affected Models:
- HiFi-Esparagus, Rev D
- HiFi-Esparagus, Rev E
- Loud Esparagus, Rev D
Issue Details:
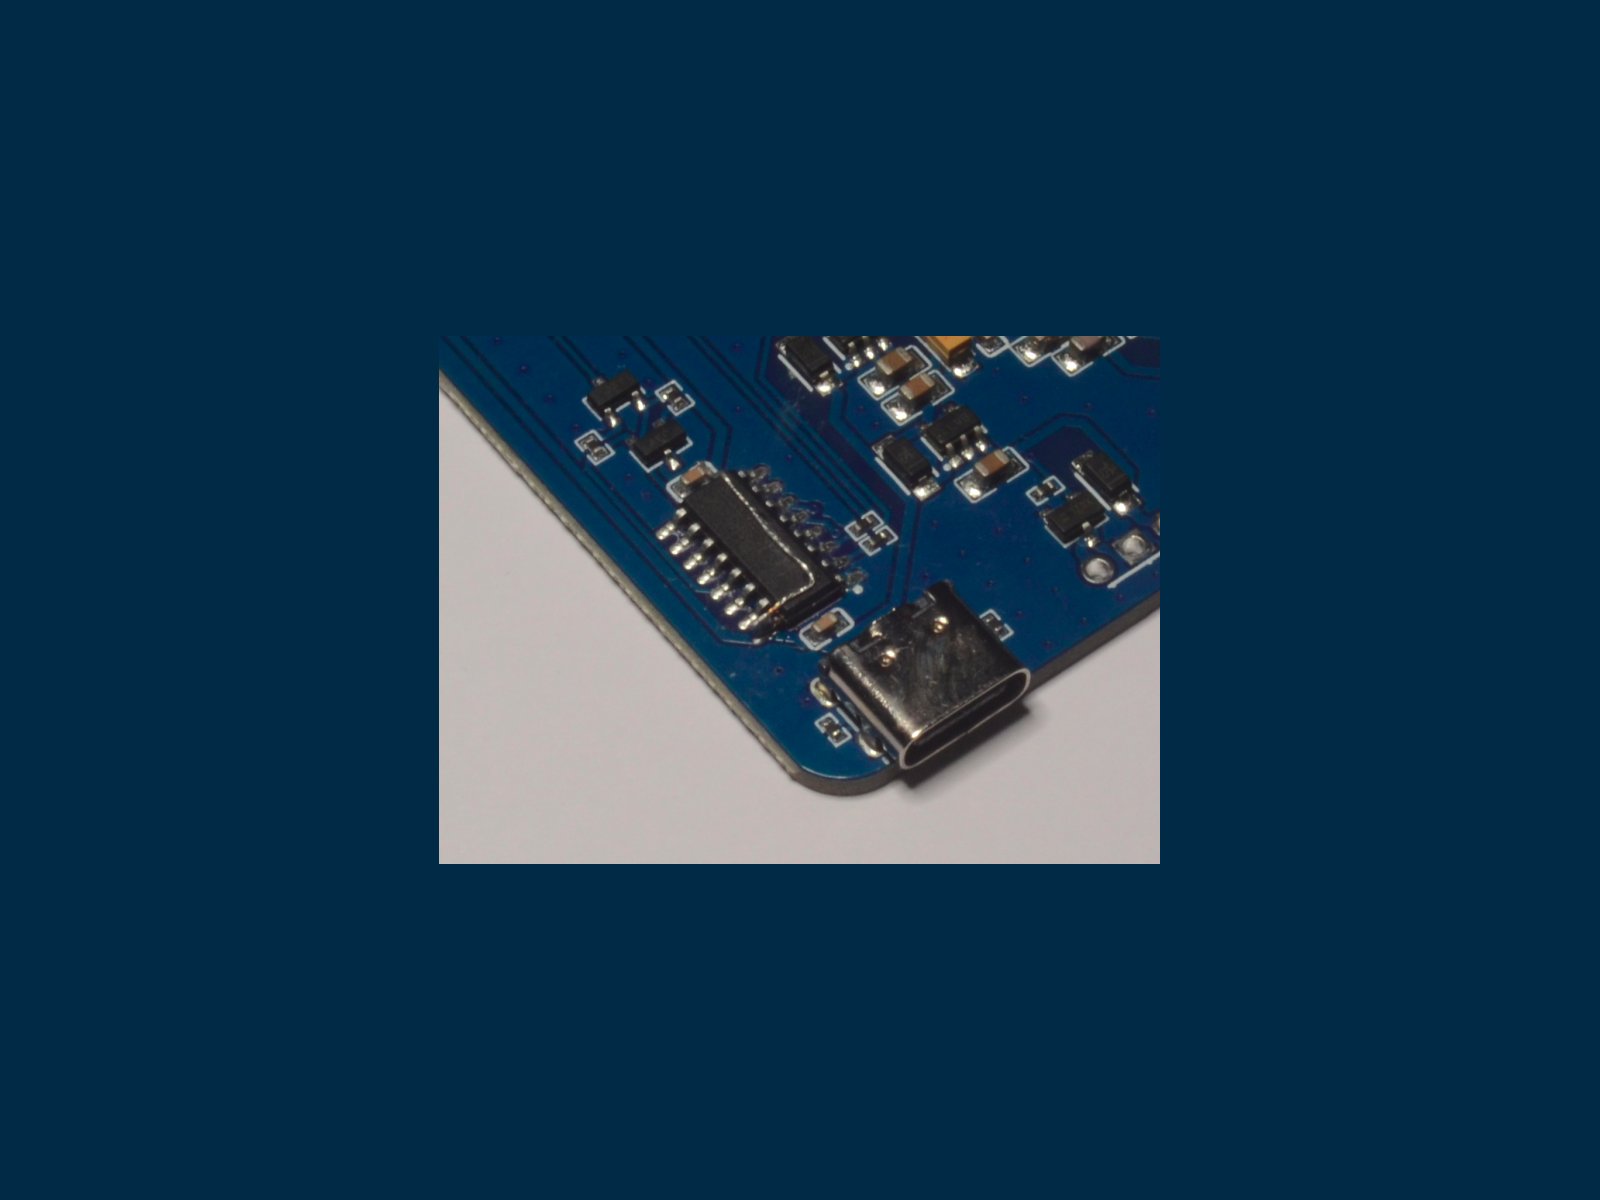
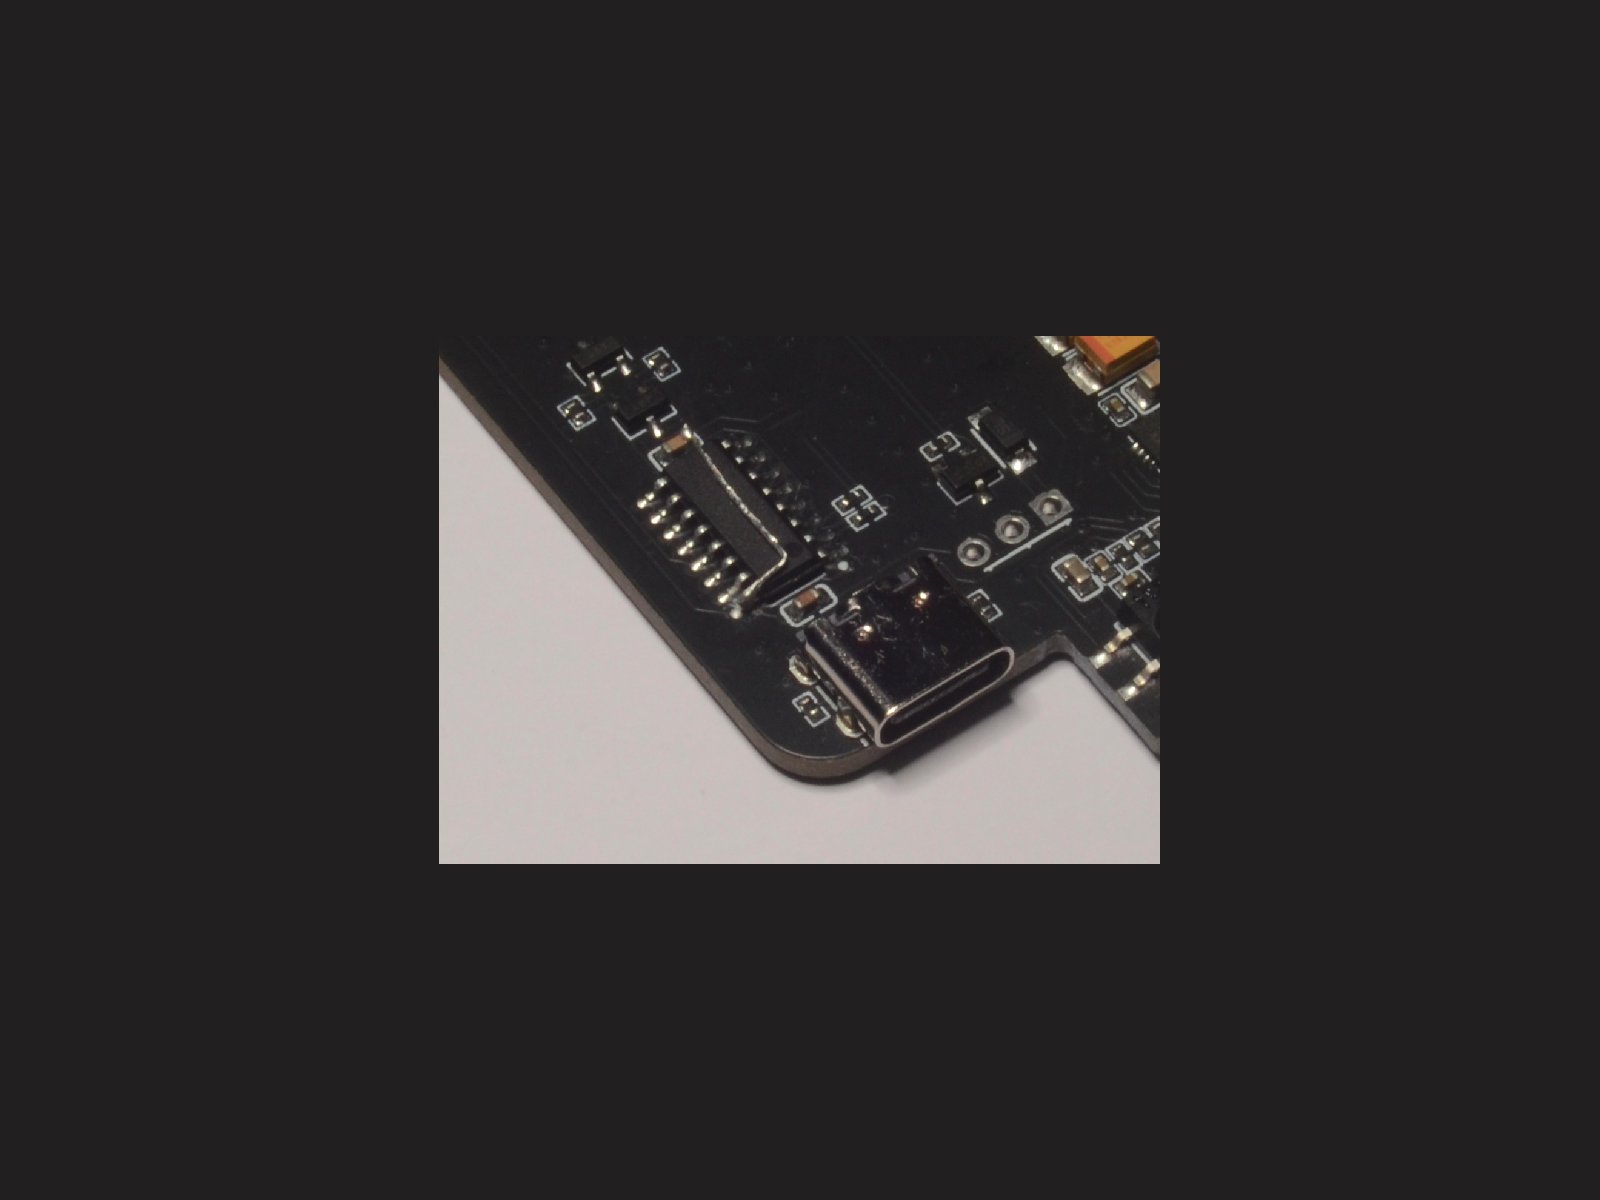
Turns out, there’s a small error in the schematics: the VCC pin on the CH340C USB-Serial bridge is connected to the +5 V line, which produces 5 V on the RTS and DTR control lines. This ends up putting about +4.2 V on the ESP32’s RST and IO0 pins, which is a bit too high. While many units run just fine, some have this WiFi issue. The good news is, no permanent damage happens and we can apply a hardware fix.
Symptoms:
You might notice weak WiFi or Bluetooth, causing audio issues like breaking and stuttering.
Temporary Fix:
If you connect the serial monitor over the USB-C port, it brings the RST pin back to +3.3 V, so everything works as expected.
Permanent Fix:
The next board revision has this fully resolved:
- HiFi-Esparagus, Rev F
- Loud Esparagus, Rev E
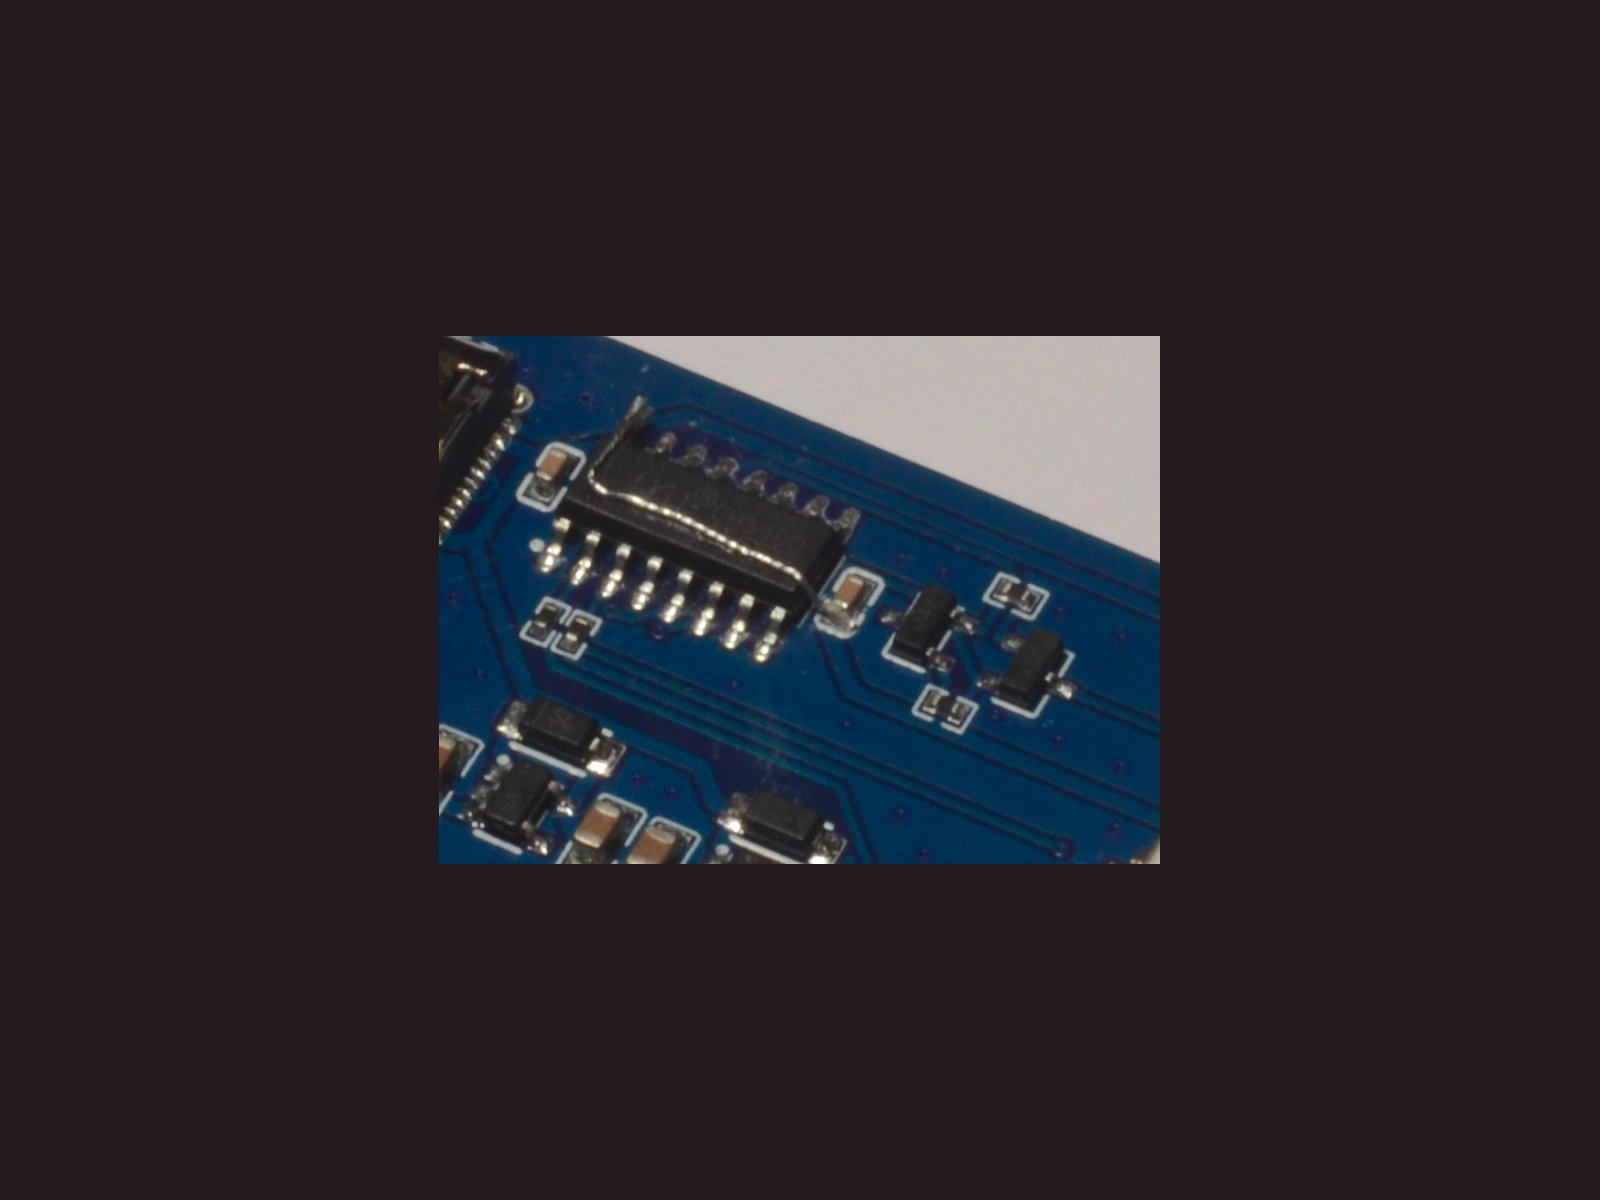
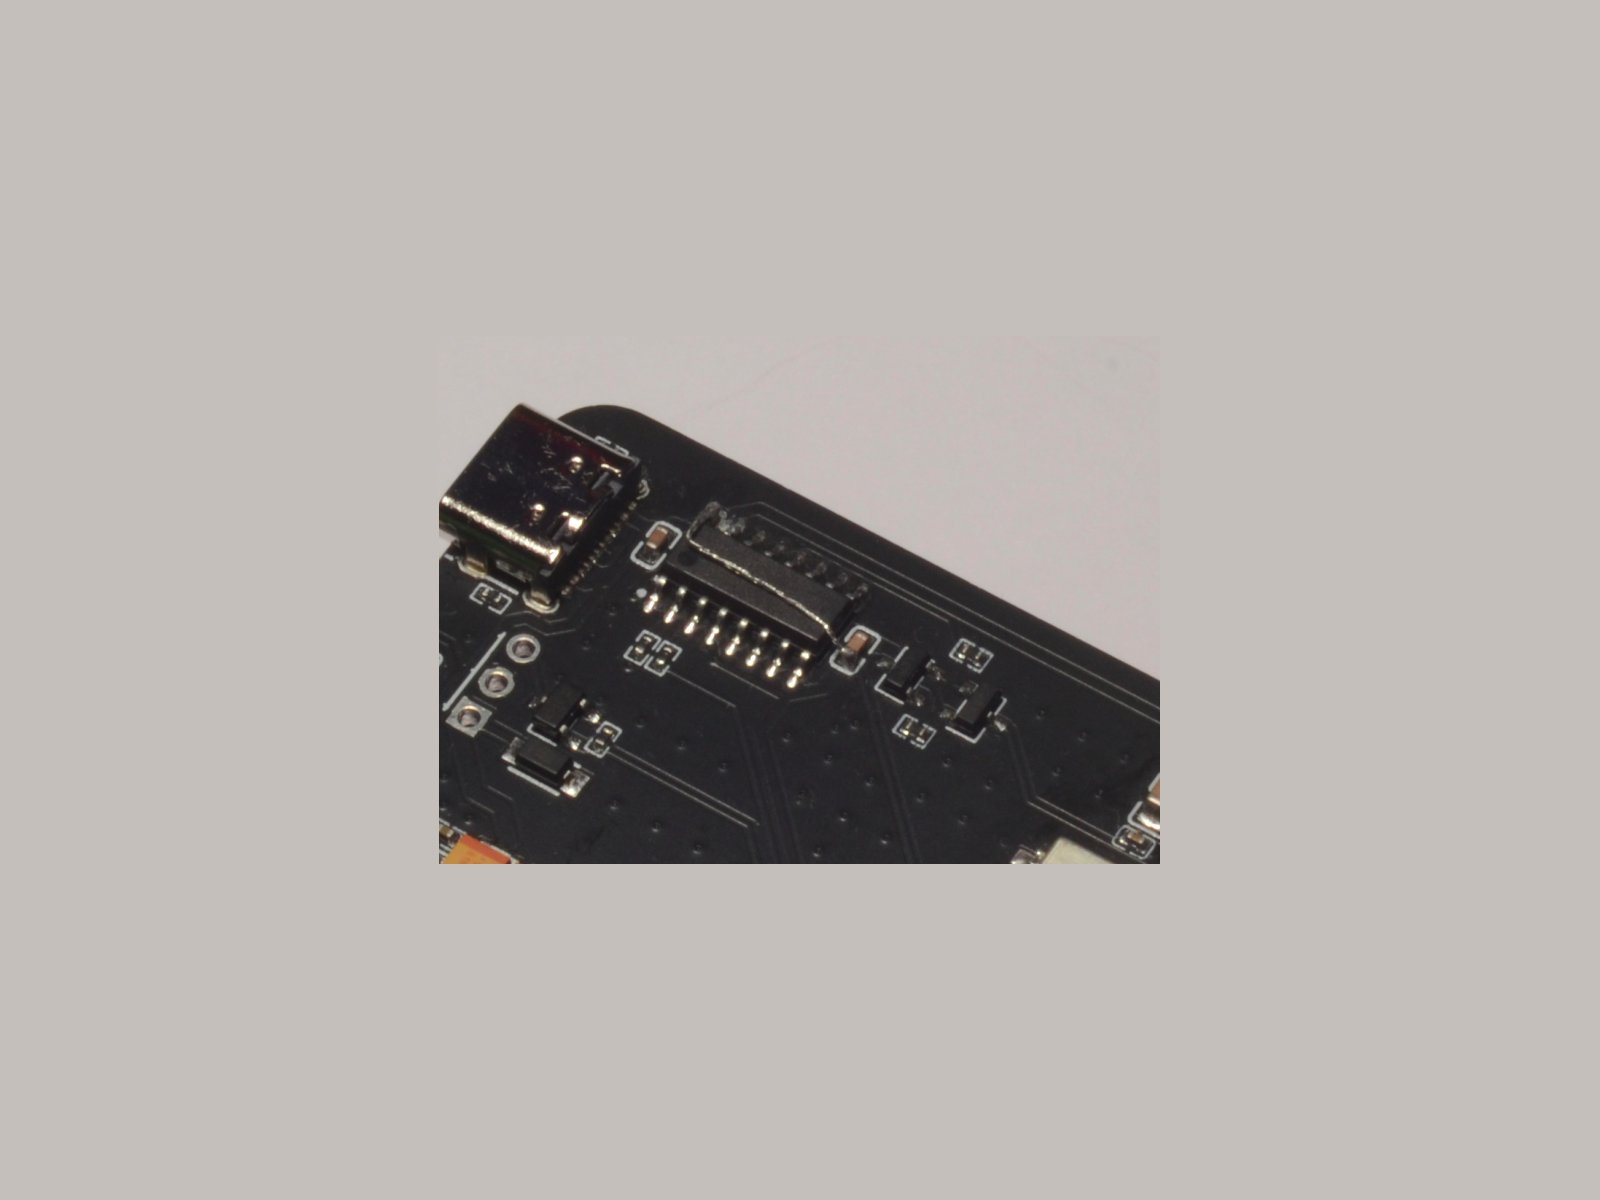
If you want to fix it yourself, here’s a step-by-step guide. It’ll require some moderate soldering skills and a thin piece of copper wire.
Step One
Disconnect the VCC pin from the 5 V line. You can use a sharp tip with your soldering iron and a sharp tool. You lose the ability to flash the unit using the USB-C port at this time.
Step Two
Connect the lifted pin to 3.3 V line. Flashing capability is restored.
Optional
Secure the wire with hot glue or Kapton tape.
