Project update 2 of 11
Swarmdrive Remote Control Tutorial, and New Silkscreen
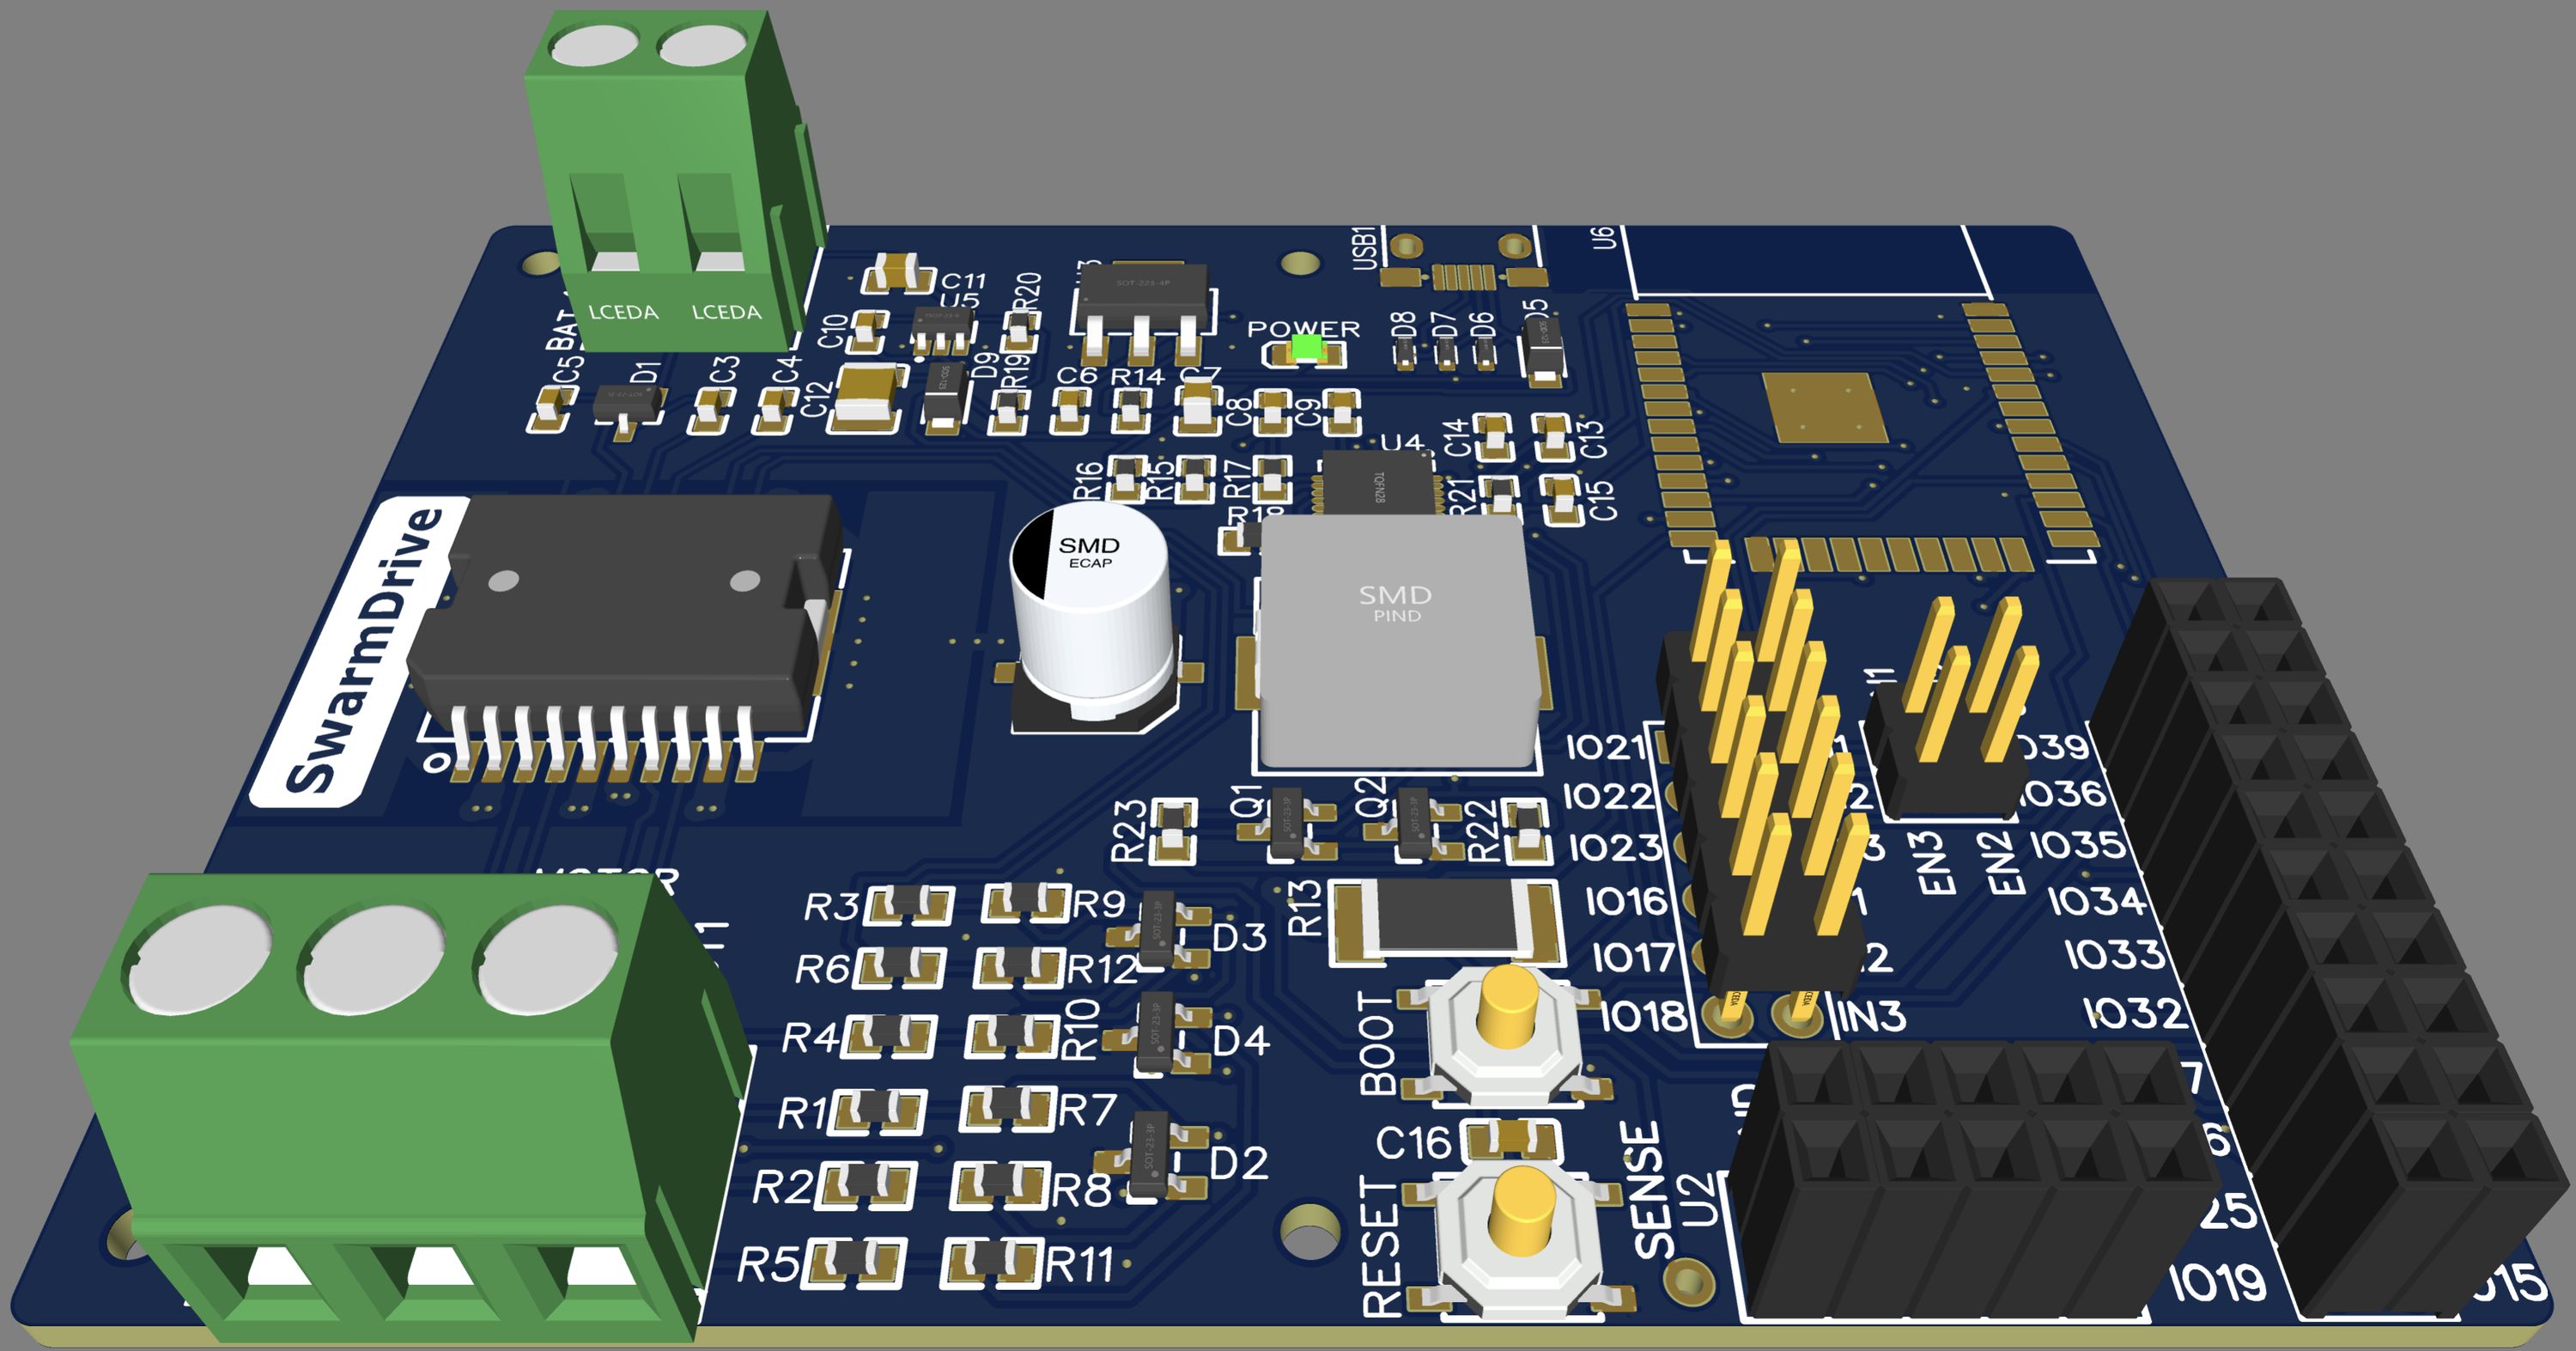
by Majodi PloegmakersWhile awaiting the outcome of this campaign with excitement, I decided to start a small preliminary production run. This is needed to verify a few minor changes, one of them being the addition of the SwarmDrive logo to the silkscreen, but also some minor adjustments of some tracks.
The design files were handed over for production about a week ago, so I’m hoping to be able to share some pictures soon. In the meantime, here is a render of how they should look:
Remote Control
Besides talking about the progress of production, I would like to use these updates to share some thoughts about technical matters and perhaps a few lines of code or other practical stuff. Perhaps some of it will serve as a reference for others later on. This week I would like to show how you could lay the foundation for remote control of a SwarmDrive.
Of course, such a thing could be done in many ways by using the available communication features of the ESP32. In this post I would like to focus on host to client communication, where you command your SwarmDrive as a network connected device from your computer or phone.
Blynk
You can utilize Blynk, a phone app, for this task. Mainly because it is easy to get a nice phone app running in no time. With the library and some code, you connect your device to their servers and run a UI on your phone to control the device. Building the UI is as easy as throwing on a few buttons in a mini designer on your phone and you’re good to go.
UDP Protocol
I would also like to propose a more home brew solution where you don’t need an external server/service and don’t have to pay for buttons. You could use the UDP protocol to talk to your network connected devices. It is super-fast with very low latency, something that can be important when working with movement control. It can also be done surprisingly easy, even without the use of any third-party libraries other than what’s available from the Arduino Core library itself.
You’ll need the AsyncUDP library. With this you can send and receive small packets that could contain commands or other data to be processed. The idea is to use your computer or phone (connected to the same network) here.
Next week I will explore ways to do peer-to-peer communication between SwarmDrive boards without the need for an existing network, but for this week’s goal you will need to connect your SwarmDrive to the network. To do this, you simply call WiFi.Begin() and waiting for a connection. Then you call udp.listen() and specify what to do if data is received. That’s it. Pretty simple.
The sending part in this example lives on your computer. It can be a Python script, some JavaScript or any other piece of your own UDP implementation. For simplicity I just use Netcat, a networking utility for sending and receiving using TCP or UDP.
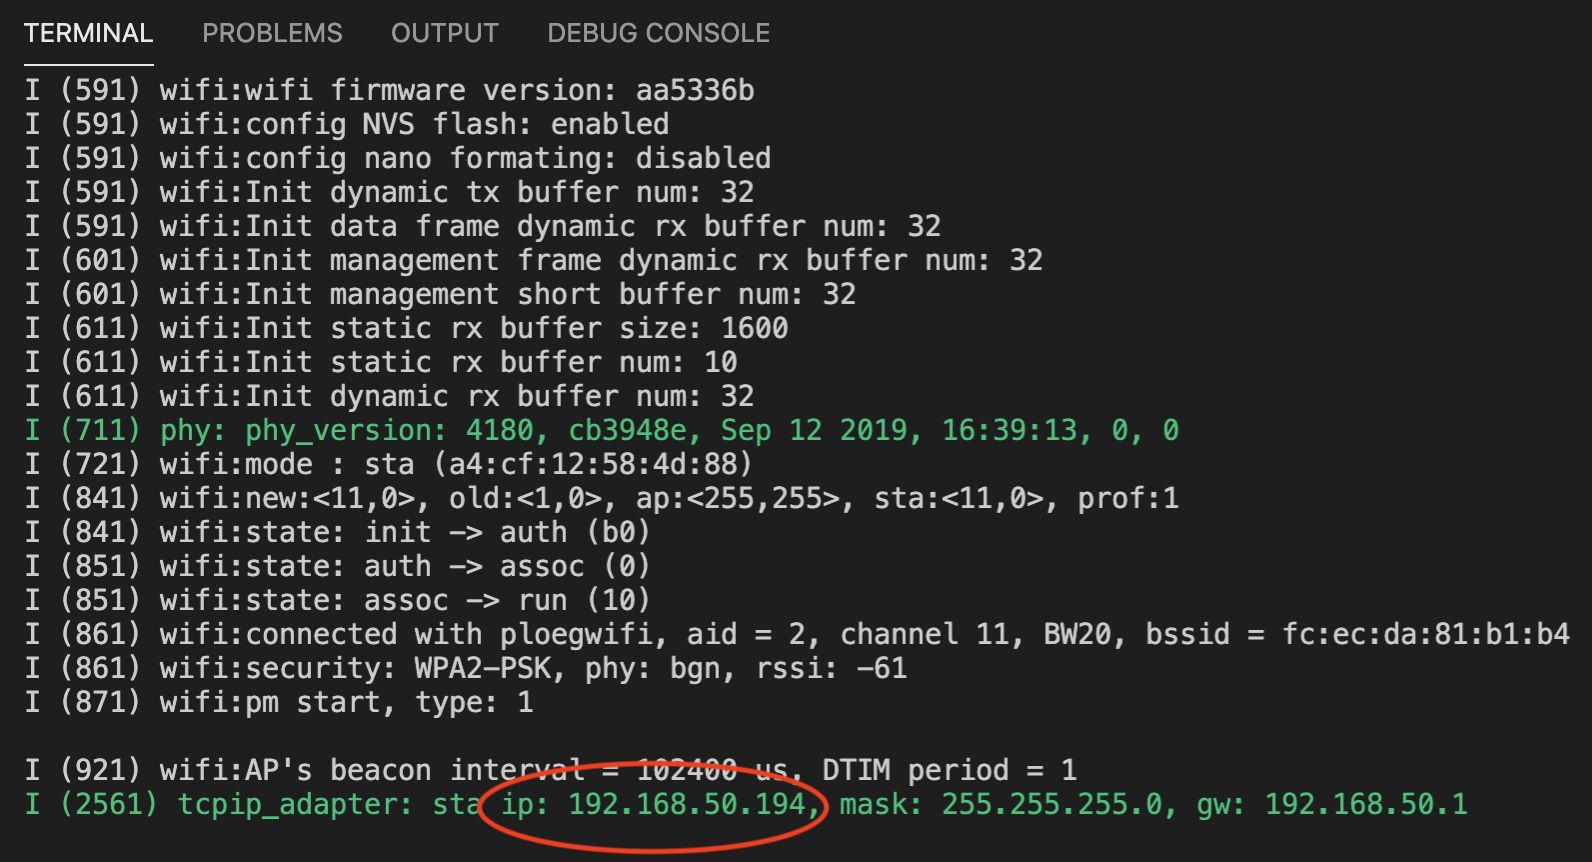
So, after uploading the example code (see below) to the SwarmDrive, it will respond through the serial monitor with what it received. Note the IP address of your SwarmDrive (shown in the monitor as well) when powering-on/resetting it:
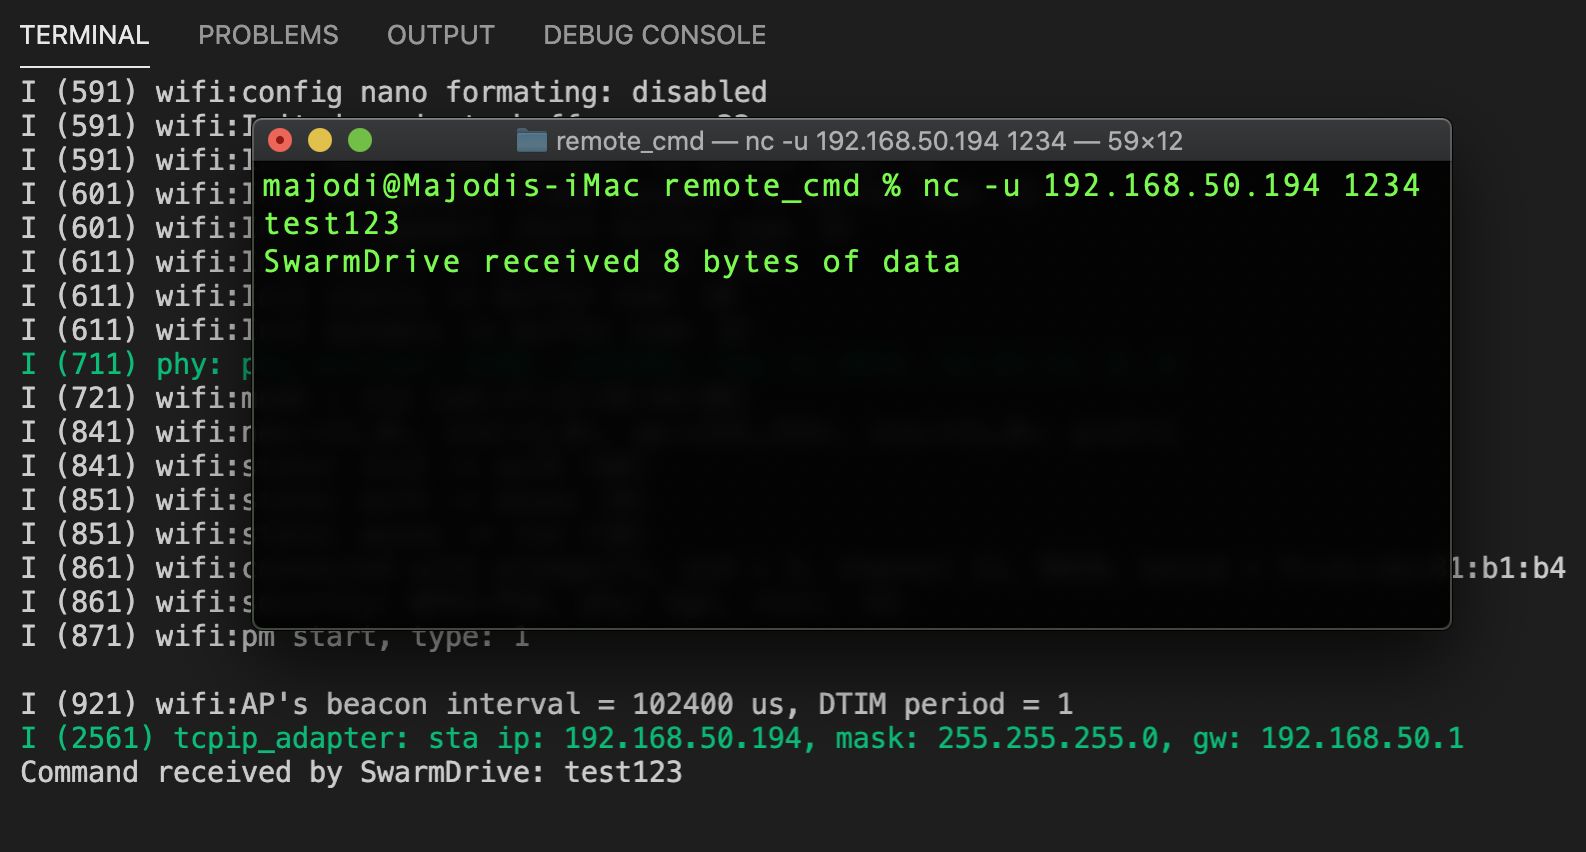
Now from any computer on your network, in a terminal, you can start a Netcat session for communicating with your SwarmDrive by typing:
nc -u IP PORT
The -u command line option is to tell Netcat that you’re doing UDP. The IP address you got from the startup info of your SwarmDrive and the port is what you use in your code.
Now anything you type will be transmitted to your SwarmDrive. It will respond immediately with a receive confirmation.
Below you will find the complete code. To be complete I also provide my platformio.ini below. As you can see I use a mixed environment setup for Arduino and ESP-IDF when needed. The Arduino Core (arduino-esp32) library contains the easy to use networking functions we use here. For the board platform I just picked the esp32doit-devkit-v1 which is compatible with SwarmDrive.
If you get an error: “Please configure IDF framework to include mbedTLS -> Enable pre-shared-key ciphersuites and activate at least one cipher” you need to enable these using menuconfig:
platformio run -t menuconfig (make sure your screen is not too small, or this won’t run)
Component Config -> mbedTLS -> TLS Key Exchange Methods ->
  [*] Enable pre-shared-key ciphersuits
    [*] Enable PSK based ciphersuite modes
platformio.ini:
[env:esp32doit-devkit-v1]
platform = espressif32
board = esp32doit-devkit-v1
framework = arduino, espidf
monitor_speed = 115200
monitor_filters = direct
upload_port = /dev/cu.SLAB_USBtoUART
monitor_port = /dev/cu.SLAB_USBtoUART
platform_packages =
  framework-arduinoespressif32 @ https://github.com/espressif/arduino-esp32.git#idf-release/v4.0
Code:
#include <Arduino.h>
#include <WiFi.h>
#include <AsyncUDP.h>

const char * ssid = "xxxxx";
const char * password = "xxxxx";
AsyncUDP udp;

void wifiConnect() {
    WiFi.mode(WIFI_STA);
    WiFi.begin(ssid, password);
    if (WiFi.waitForConnectResult() != WL_CONNECTED) {
        printf("WiFi Failed\n");
        while(1) {
            delay(1000);
        }
    }
}

void initUDP() {
    if(udp.listen(1234)) {
        udp.onPacket([](AsyncUDPPacket packet) {
            printf("Command received by SwarmDrive: %s\n", packet.data());
            packet.printf("SwarmDrive received %u bytes of data", packet.length());
        });
    }
}

extern "C" void app_main()
{
    initArduino();
    wifiConnect();
    initUDP();

    while (1) {
        vTaskDelay(10 / portTICK_PERIOD_MS);
    };
}
Well, that’s it for this update. Next time we will explore SwarmDrive-to-SwarmDrive communication using ESP-Now.
Until next time,
Majodi


