Project update 5 of 12
Slicer Software: The More Options the Better!
by Alfredo BoniniWe’re in the final hours of our campaign! We are very honored and grateful for your support!
This time, we will talk about the "slicer" software that processes 3D models (normally in STL or OBJ format) and produces images of the sections to be printed. Correct processing using a slicer is necessary for the success of any 3D printing. Every slicer will allow you to accommodate a 3D model in the build volume, generate a support structure, and process it to obtain the sections. It is essential to:
- Ensure correct adhesion of the print to the build platform using a flat surface.
- Generate a support structure to hold the entire part, especially those areas with overhangs (that is, those that when it comes time to print are presented as an area isolated from the rest of the part).
- Minimize the surfaces of the sections to be printed, in order to minimize lift forces.
Normally, slicers require significant intervention from the user, who will apply their own criteria to define and validate the correct location and orientation of a part and the correct generation of the support structure. The user’s criteria will be based on the three aforementioned principles and experience they have acquired over time. Each print is different and will require a different treatment, and its difficulty will depend strongly on its geometry.
Today there are several slicers available, each with its strengths and weaknesses. And it is very important not to be restricted or limited to using only one of them. Maybe one slicer is faster at processing a simple 3D model, while another has a better auto-support engine, or another one has a friendlier interface. You can even use more than one and choose between them depending on the part to print. That’s actually what we do.
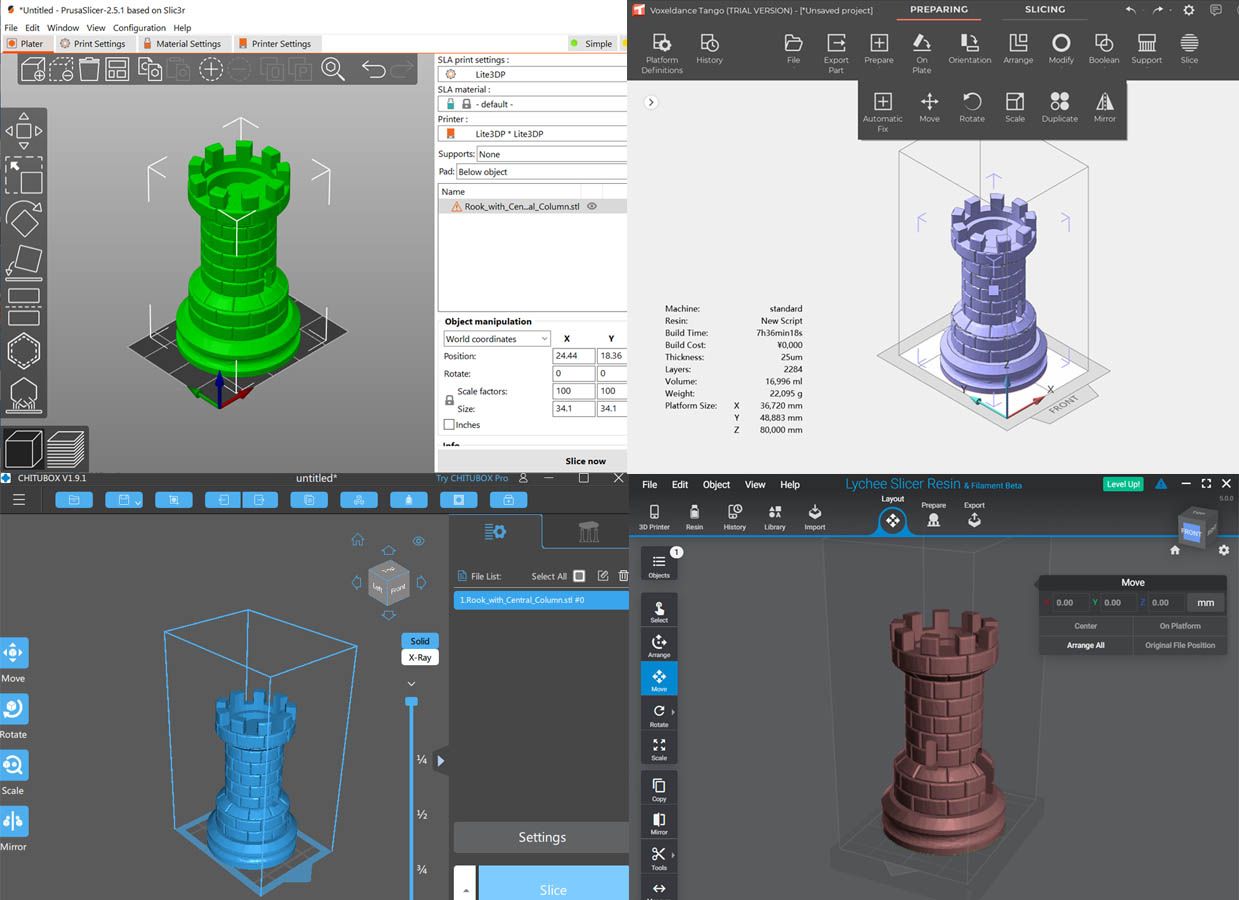
For Lite3DP Gen 2, the only requirement for a slicer to be compatible is that it can output a compressed file (e.g., ZIP or CWS format) containing PNG images of the sections. Then it’s just a matter of identifying and putting together the name that each slicer generates for the PNG images, for example:
- Lychee:
lychee0000.png,lychee0001.png,...; orlychee000.png,lychee001.png,... - Prusa slicer:
foldername00000.png,foldername00001.png,... - Chitubox:
1.png,2.png,... - Voxeldance Tango:
0.png,1.png,...
Lychee, Prusa slicer, Chitubox, and Voxeldance Tango were chosen because they are among the most popular and have versions that do not require payment to use, but others can be included. If you are interested in any other slicer, please write to us via the Ask a Question link and we will be happy to include it. Or you can even do it yourself with relative ease. You have the open source firmware at your disposal!
For the four slicers mentioned, we have recently added a preliminary step-by-step guide to Github to help you configure them correctly. If you are new to resin 3D printing, you can now try them out and get familiar with them.
Each slicer has its own documentation and support for its use, which will not be different for Lite3DP, so we will not cover that topic in depth. Instead, we will provide a universal guide to be applied to all slicers to obtain the best results for Gen 2.
It should also be noted that Gen 2 only requires PNG images of the sections for its operation (always process with layer height = 0.025 mm), since the printing parameters are selected on the same machine, which allows you to use different layer heights and resins for the same processed file. This is not common. As far as we know, Lite3DP is the only—and it’s definitely the first—printer to have this feature. Other 3D printers require processing the file for each resin and for each layer thickness.
Thank you very much for joining us!

