Project update 5 of 13
Evolution of the Circumference 100
Evolution of the Circumference 100
The 32+1 node C100 is the first Circumference configuration that we developed, and we thought we’d take the opportunity to share a few insights into its development.
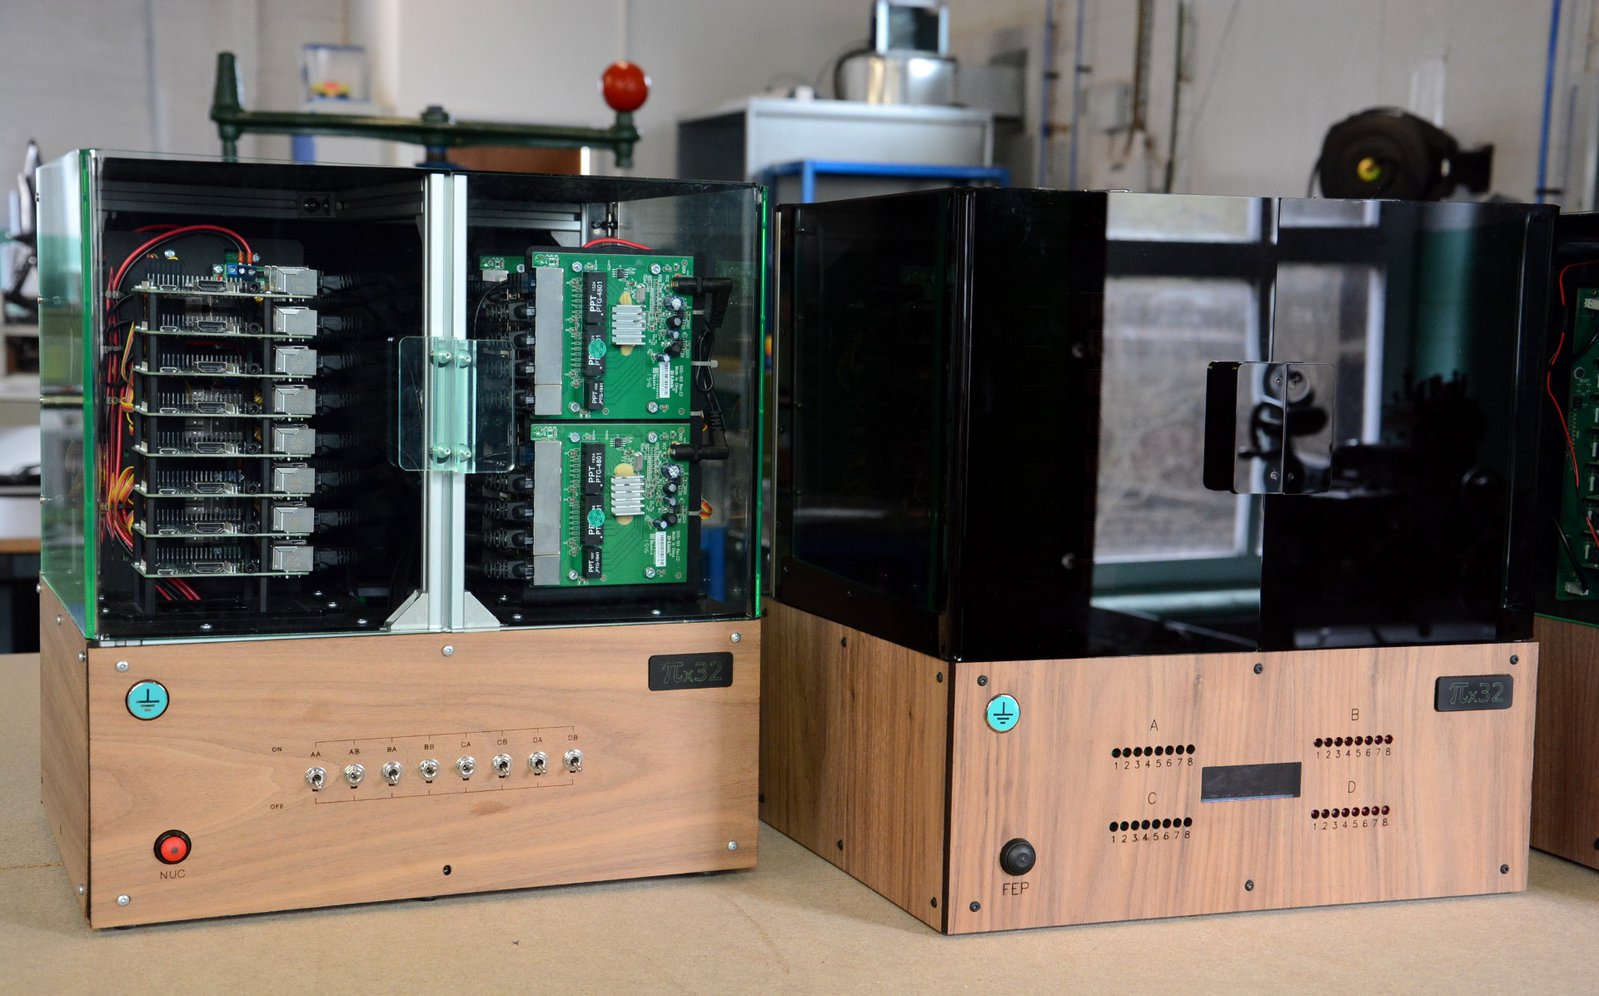
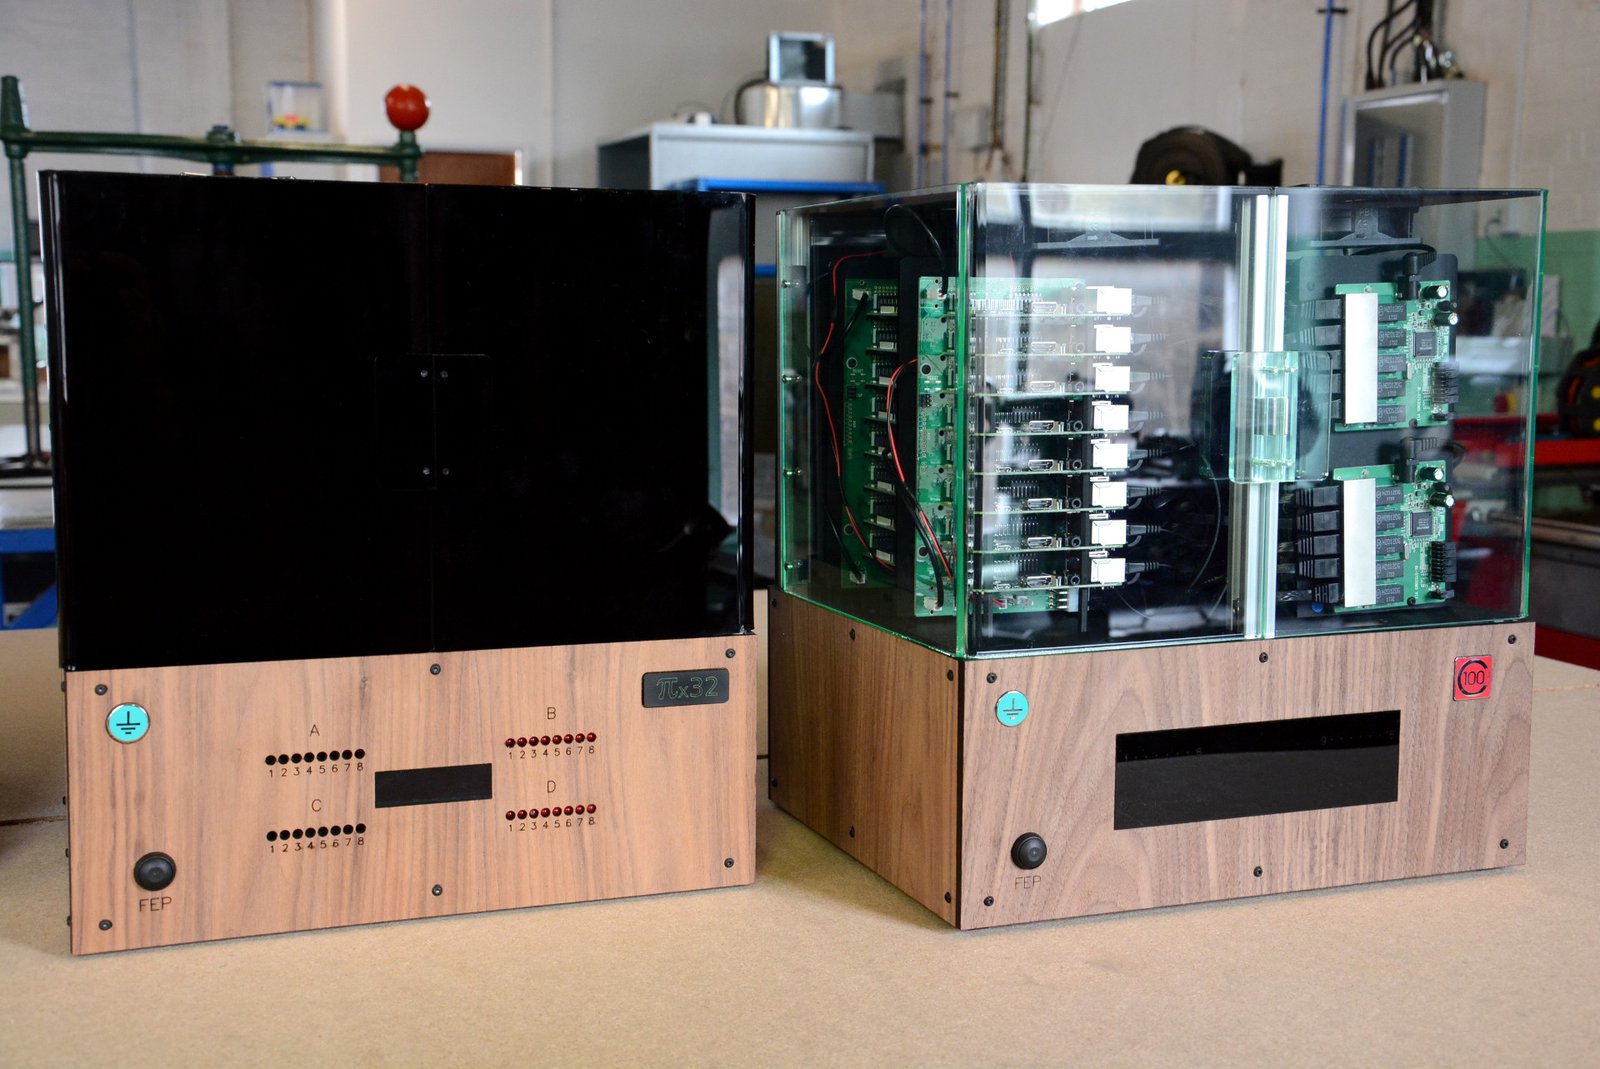
Above you can see the first, second and third completed prototypes — but aside from the different colour acrylic doors used on the middle system, what else has changed?
Starting with, perhaps, the most visible change: on the lower front of the left most system, the first prototype, we have a row of toggle switches. No software control of power sequencing here, or indeed power control at the node level — simply one per switch per four compute nodes.
So how were compute nodes powered?
For the first prototype we used off-the-shelf quad-USB power modules, each supplied via a toggle switch, and with a lot of small custom cable assembles. Reasonably neat, but not ideal.
Speaking of not ideal, as you can imagine there was quite a bit of wiring running between the upper and lower parts of the enclosure, in order to distribute 24 V via the front panel switches to the USB power modules located in the upper part.
For this first prototype we also used an external PSU in its own enclosure, as the lower part of the main enclosure was starting to get somewhat cramped with all the cabling.
This first prototype was itself developed over numerous iterations as we experimented with the chassis and overall mechanical design, amongst other things. However, before long we came to the conclusion that a custom backplane would be required if we were going to eliminate as many cables as possible — and this was a key objective.
Above we can see prototypes 1 and 2 side-by-side, showing the toggle switches having been replaced by the indicator LEDs and matrix displays of the ‘C100FP’ custom front panel PCBA.
Hidden out out of sight we have four of the CAD revision 1 ‘C25BP’ custom backplane PCBAs. Internally this was a really great improvement in terms of cabling and ease of maintenance, not to mention bringing with it software control of power and remote console, and instrumentation.
However, those 32x individual LED holes and a smaller window for the matrix displays did look a touch busy, and the resulting aesthetic was not entirely satisfying.
Finally we get to prototype 3 and a far cleaner look for the front panel, thanks to a much larger window cut from acrylic which appears opaque until illuminated behind by LEDs.
There were obviously a lot of other changes along the way, such as sourcing black stainless steel hex socket button machine screws, to again give a cleaner look. Similarly using midnight black acrylic for any parts which might otherwise easily pick up finger marks.
We didn’t stick with the original working model name for the product either. Bonus points if you worked out how we arrived at the current naming — the clues are in the photos — and double points if you spotted the source of inspiration for the C100 enclosure design!
Andrew and the Circumference Team


